FREE DESIGNS AND ESTIMATES

Types of Natural Stone For Your Home

types of natural stone

The most familiar natural stone types that are used in countertops and most home applications fall into three categories: Igneous, metamorphic, and sedimentary.

  • Igneous stone, such as granite, is formed mainly with volcanic material. Liquid magma underneath the earth’s surface solidifies while mixing with mineral gases and liquids to create different formations and colors.
  • Metamorphic stones were made from a natural from of stone that was transformed by a mixture of heat, pressure, and minerals. These types of stone include quartzite, marble, serpentine, and slate.
  • Sedimentary stone comes from organic elements where small sedimentary pieces accumulated to form rock beds and were bonded through millions of years of heat and pressure. They include limestone, sandstone, soapstone, onyx, and travertine.

Read more to learn a little about these different types of stone and the kinds of applications they are used for.

Read more

New This Week: 2 Ways to Rethink Kitchen Seating

Article by: Mitchell Parker, Houzz

Kitchen seating seems simple enough. Scoot in a few bar stools around an island or a peninsula and you’re done. But when you’re trying to create something flexible for small and large gatherings, accommodate a view or make the most of a compact layout, it’s time for something a little more outside the box. Here, two designers explain how they rethought mealtime in the kitchen.

Read more

How to Clean Your Hardwood Floors

Mopping Clean Hardwood Floor

Article by: Bonnie McCarthy [Houzz]

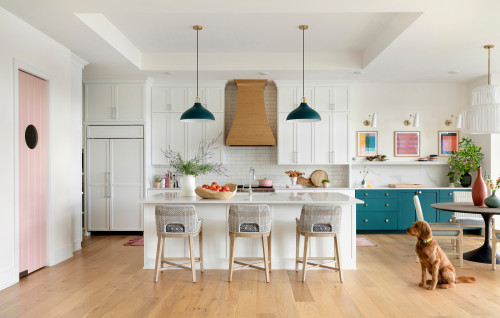
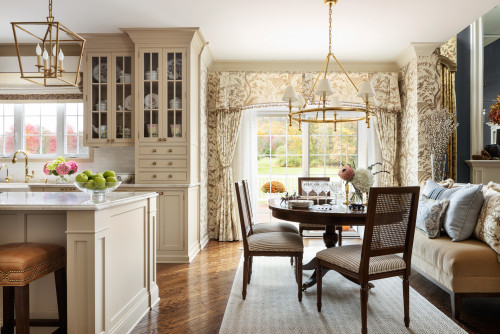
Although installing hardwood flooring is usually more expensive than rolling out new carpet, it’s an investment worth considering, according to data from the National Association of Realtors. Surveys show that 54 percent of home buyers are willing to pay more for a house with hardwood floors. The question now: What’s the best way to clean and care for that popular flooring and keep that natural beauty (and value) shining through? Here’s how.

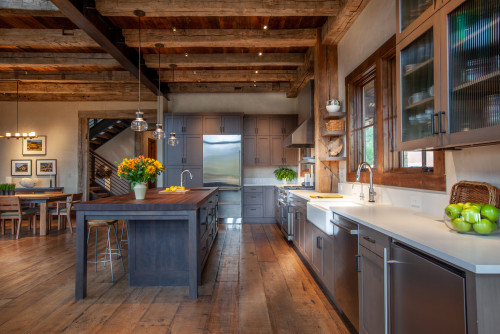
It’s not the wood — oak, maple, mesquite, bamboo, engineered hardwood or something more exotic — that determines how the floors should be cleaned, but rather the finish.

Surface finishes, often referred to as urethanes or polyurethanes, are among the most popular treatments today and are usually applied to hardwood floors after installation to protect them and make them more durable and water resistant. These finishes create a protective barrier. There are four types of surface finishes, according to the American Hardwood Information Center: water based, oil based, acid cured and moisture cured.

Homes built before 1970, including historic residences, may have original wood floors that were sealed with varnish, wax or shellac. These require a different approach to cleaning. The American Hardwood Information Center says these types of finishes work by penetrating the wood to color the planks and form a protective shield. Using a wax coating after staining provides a barrier against wear and tear and gives the floor a beautiful low-gloss satin sheen. The classic look requires a little extra TLC, however, since water-based products and mopping can damage the finish.

How to Determine Your Wood Floor Finish

To figure out whether or not your wood floors are finished with a polyurethane, shellac, wax or varnish, or have a finish that has worn away and is no longer providing coverage, the American Hardwood Information Center suggests these tests:

  • Run your hand over the wood. If you can feel the texture of the grain, the floor has a “penetrating” finish (usually a combination of a natural oil, such as linseed or tung oil, mixed with additives for drying) topped with wax.
  • In an out-of-the-way spot, dab on a little paint remover. If the finish bubbles up, it is a surface finish, like polyurethane, which coats the floor in a protective layer.
  • In an out-of-the-way area, place a few drops of water. If the water beads up and does not soak into the wood, the finish on the floor is intact. If the water is absorbed into the floor or leaves a dark spot, the wood is unfinished or the protective layer has worn away.
  • If you sprinkle on a few drops of water and white spots form beneath the droplets after about 10 to 15 minutes, the floors are sealed with wax. To remove the white spots, use a piece of fine steel wool lightly dampened with wax and rub gently.
  • If you suspect a varnish or shellac, take a coin and scratch the surface of the floor in an inconspicuous corner. If the floor has been sealed with one of the older finishing methods, it will flake off.

Preventing Dirty Wood Floors

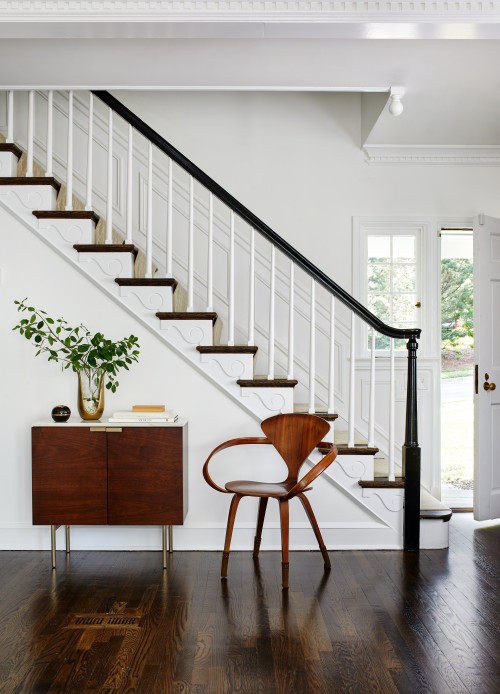
Not wearing shoes in the house is one of the best ways to significantly reduce dirt, scuffs and daily wear and tear, and lessen cleaning time.

The National Wood Floor Association, or NWFA, is more specific and warns against walking on wood floors with cleats, sports shoes and high heels. It also offers this cautionary example: A 125-pound woman walking in high heels has an impact of 2,000 pounds per square inch. Furthermore, an exposed heel nail can exert up to 8,000 pounds of force per square inch. 

Whether you got out your calculator or not, the possibility of impact and denting appears to be undeniable. However, while you can’t always ask guests to shed shoes at the door, it might be a policy worth considering for family members.

What Not to Do

No matter what type of wood flooring you have, the NWFA advises against using cleaning products meant for vinyl or tile flooring. Their take: Self-polishing acrylic waxes cause wood to become slippery and appear dull quickly. 

Another no-no: wet-mopping wood floors, since standing water can dull the finish, damage the wood and leave a discoloring residue. Along the same lines, avoid overwaxing unfinished wood floors in an attempt to restore luster. If a waxed floor has become dull, try buffing the surface instead.

Photo by User – Browse kitchen photos

Regular Wood Floor Cleaning

Cleaning floors with contemporary polyurethane wood finishes (for floors installed after 1970) starts with vacuuming, sweeping or dust-mopping the surface.

Vacuuming. Vacuum wood floors daily, or at least once a week with a vacuum fitted with an attachment for wood floors. For regular machines, the American Hardwood Information Center advises turning off interior rotating brushes or beater bars if possible.

Regular vacuuming helps remove dust and dirt particles that play a leading role in scratching and dulling the surface of the floor.

Sweeping. The American Hardwood Information Center says choosing a broom with “exploded tips,” also known as synthetic fiber ends, is step one.

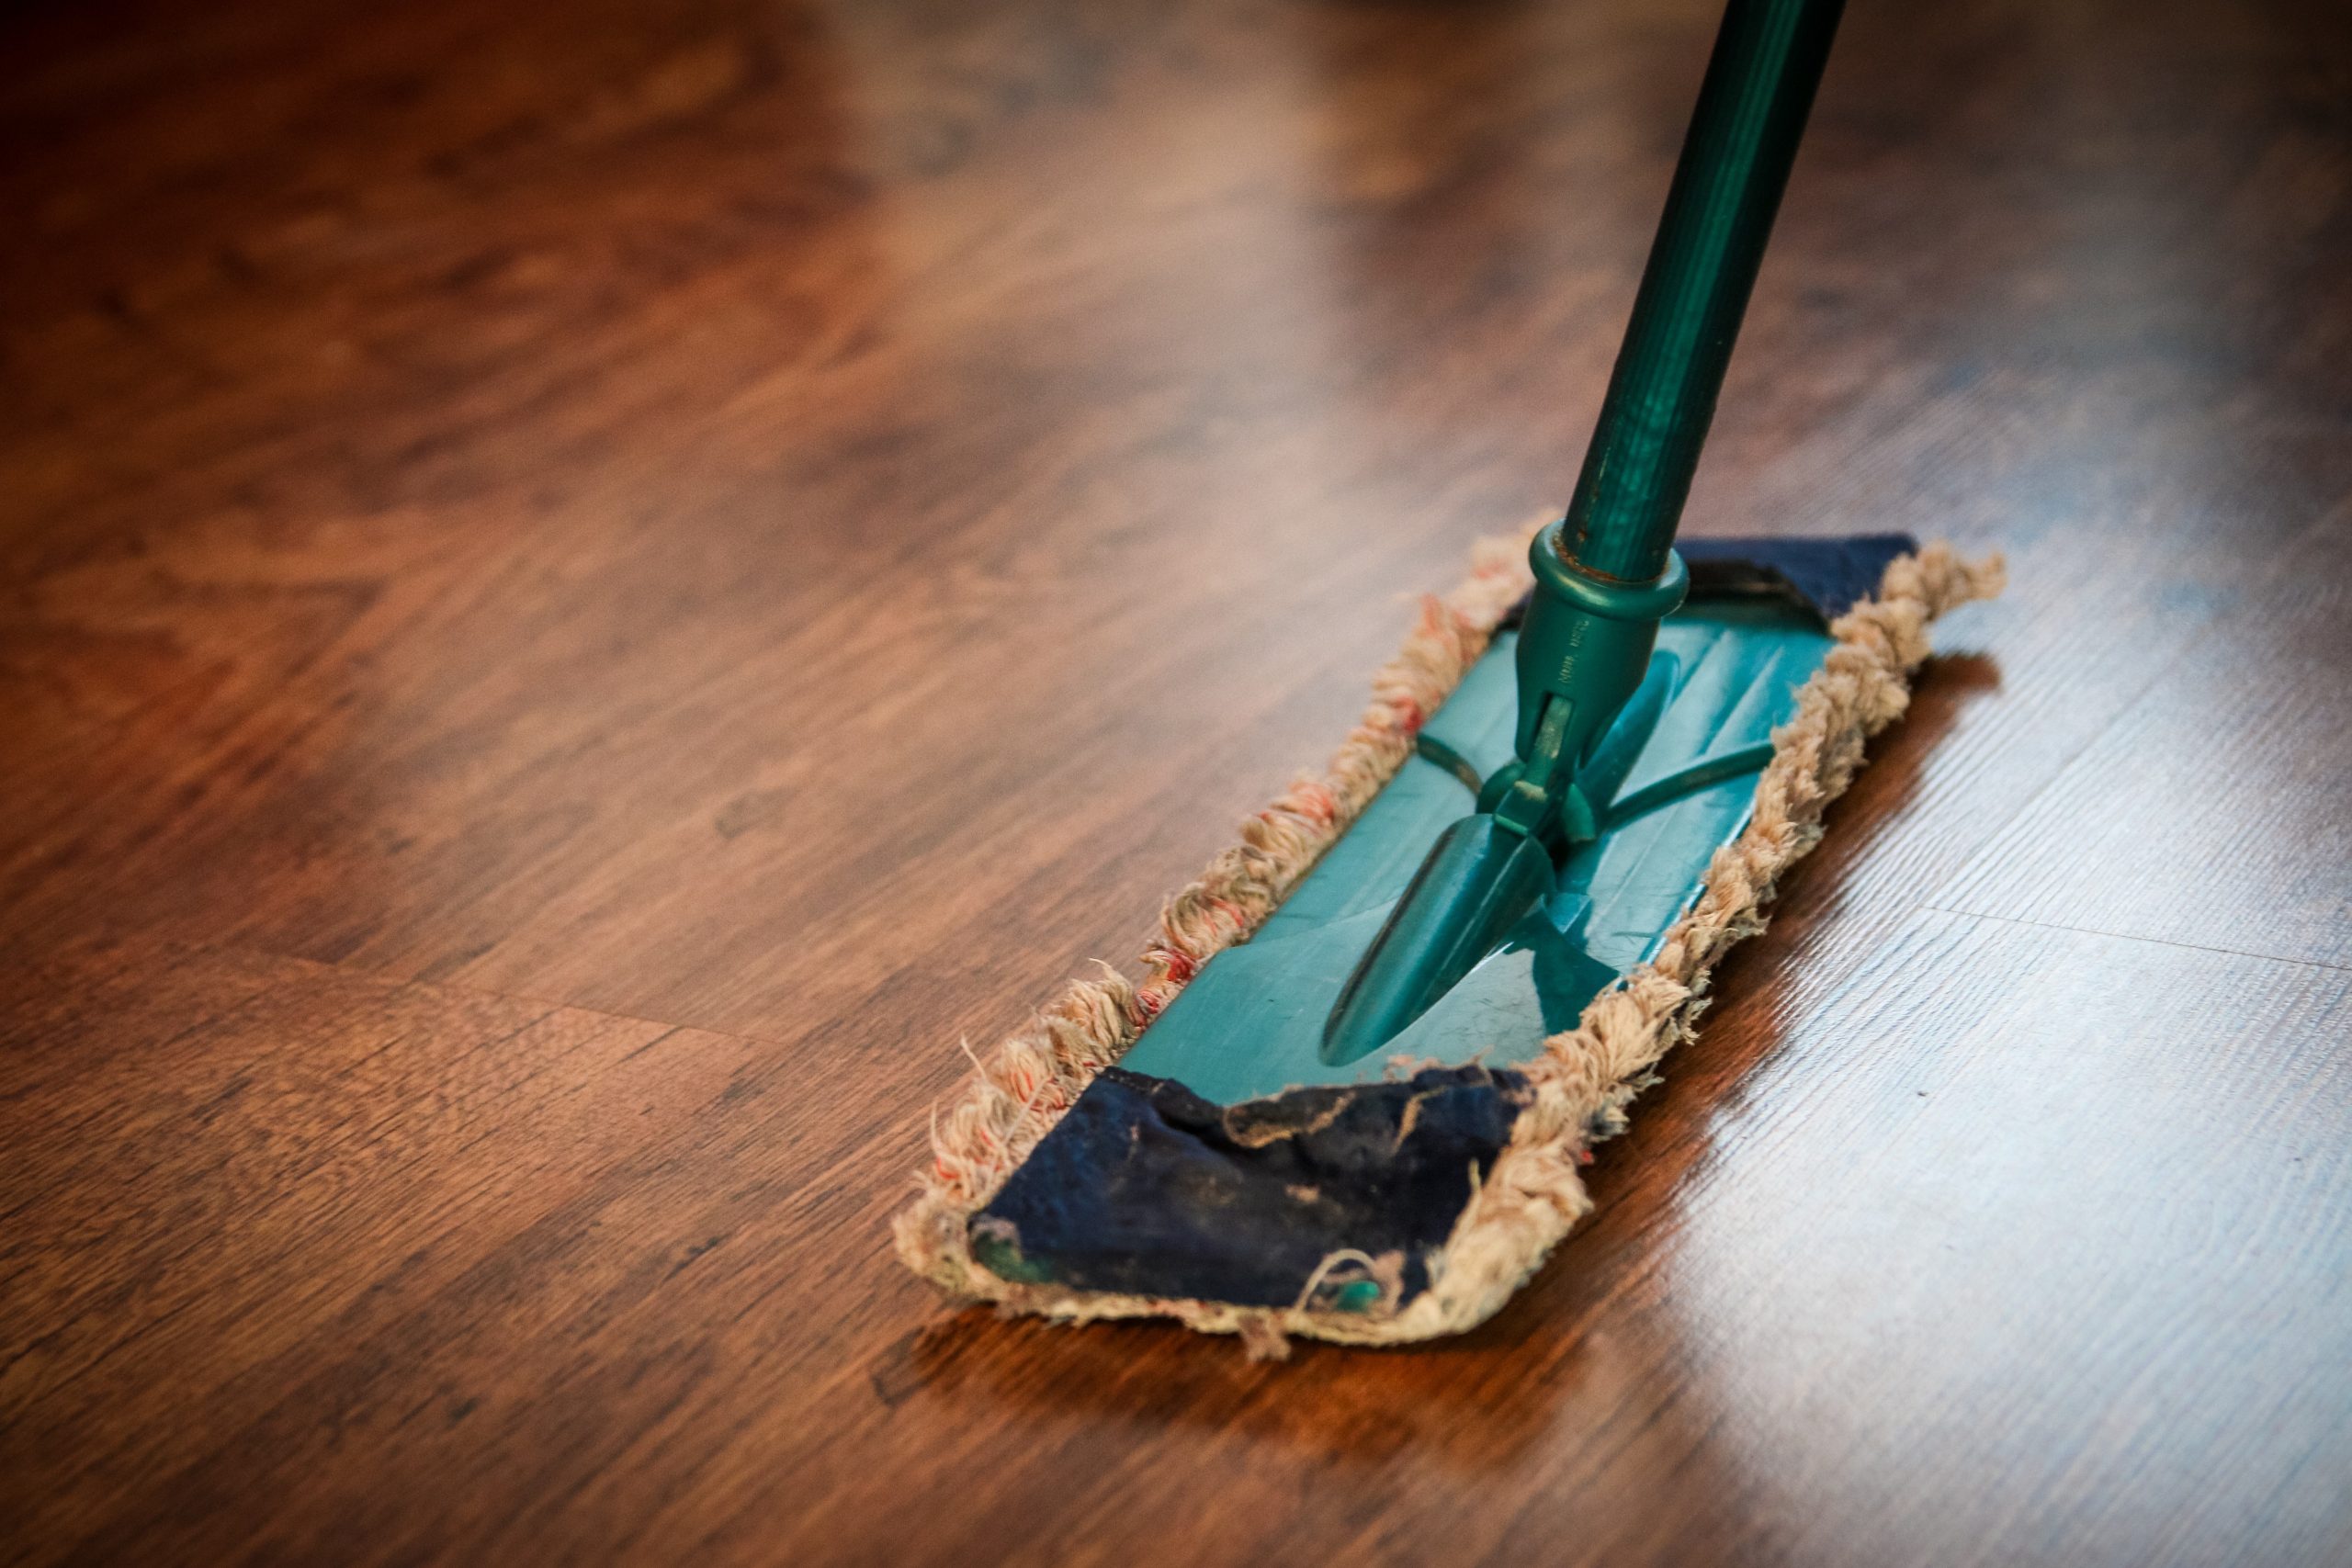
Damp mopping. Damp mopping should be done with a simple solution of pH-neutral soap (like dishwashing soap) and water; or one capful of a mild cleanser such as Murphy Oil Soap in a bucket of water; or a solution using products specially formulated for wood floors, such as Eco Mist Colloid W, Dr. Bonner’s or Method.

In conscientious cleaning circles, controversy swirls around whether to use a mixture of vinegar and water for damp-mopping wood floors. Ultimately, everyone has to do what works best; however, within the past 10 years this method has lost favor, and popular belief now holds that the solution causes floors to dull more quickly and is not as effective as simple soap and water.

To begin mopping, dampen the mop in the prepared solution, wring it out completely, and mop in the direction of the wood grain. Repeat as necessary. As the water in the bucket becomes dirty, dump it out and refill. Many experts (including Martha Stewart) believe scrubbing wood floors with a damp cloth by hand is the ultimate cleaning strategy — unless abundant square footage or protesting knees prove problematic.

But avoid cloths or mops dripping with water. If your floors do get wet or worse, dry them immediately!

Another technique: After the floor has been swept or vacuumed, put your cleaning solution of choice in a spray bottle and mist the floor, then use a dry microfiber mop or cloth and mop in direction of the wood grain. 

It’s important to note that just because a floor is clean doesn’t necessarily mean it will be shiny. If the floor has lost its luster, it may be time to have it refinished professionally. Whatever you do, don’t wax a polyurethaned finish.

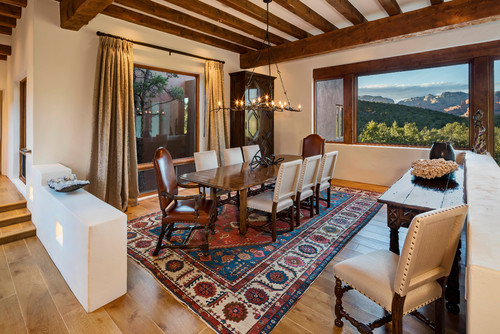
Unfinished or Waxed Floors

Unfinished or waxed floors, like those in older and historic homes, as well as floors in which the protective seal has worn away, should never be treated with water or liquid cleansers, which may penetrate, stain or warp the wood. Instead, according to cleaning experts, sweeping with a soft-bristled broom and vacuuming should be done as the primary line of defense. The NWFA says to step away from the mop: Never damp-mop a waxed floor.

Beyond basic care, buffing and waxing the floors once or twice a year should maintain the shine. 

Old-fashioned shellacked floors are not common in most homes. However, if you find yourself the proud owner of this vintage flooring, regular care should include sweeping and vacuuming often. Avoid water and liquid cleansers.

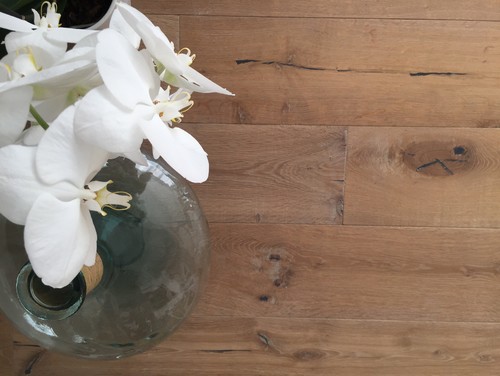
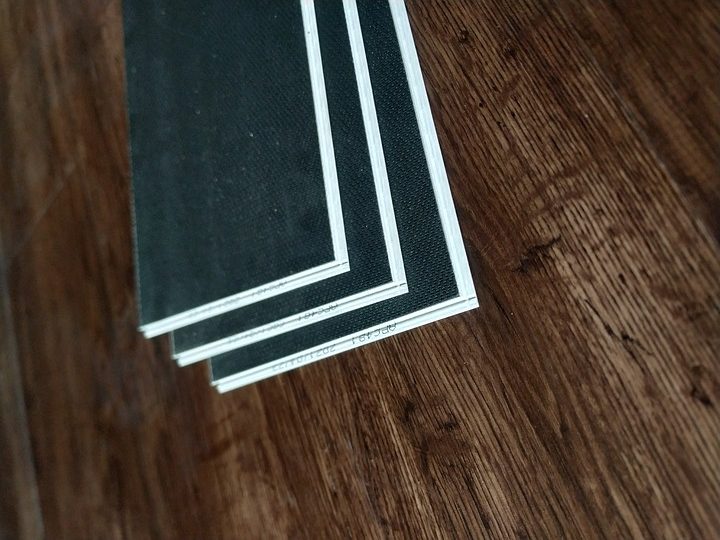
Engineered Wood Floors

Engineered wood flooring is created with a thin veneer of hardwood fused atop a plywood base. The material is stronger and more durable than regular hardwoods, and as a result has become a popular choice.

The cleaning procedure for this type of wood is the same as for hardwood floors with urethane finishes. Keep clean on a daily basis by sweeping and vacuuming and use a slightly damp mop as needed.
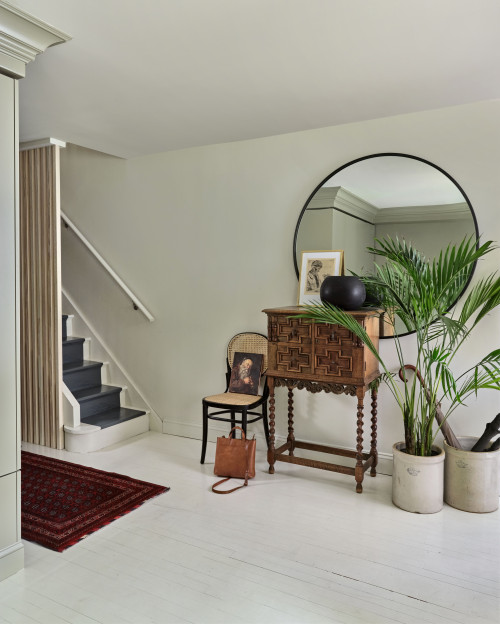
Painted Wood Floors

Painted wood floors make a strong style statement and are a clever way to disguise wood flooring in less than perfect shape. To clean them, sweep, vacuum or dust-mop regularly. Avoid scratching or damaging the painted surface by staying away from abrasive cleansers and opting for a simple soap and water solution for damp mopping. Experts suggest drying the surface immediately by hand to avoid streaking and unnecessary moisture.

More cleaning tips from Houzz…

Bathroom Floor Tile: Glass Mosaic for a Luxurious Look

Glass mosaic tile flooring can certainly add beauty to a bathroom, but it’s still a hotly debated material choice for flooring. No one can deny how great it looks, but some people question its durability and safety in a wet environment. Here you’ll learn all about the pros, cons and costs to help you decide if glass mosaic tile is a good fit for your bathroom. Could this luxurious material work for you? 

Read more

Bathroom Surfaces: Ceramic Tile Pros and Cons

Article By: John Whipple

Often praised for its durability and variety, ceramic tile is a popular choice for bathroom finishes. If you’re drawn to color and texture, this material can deliver on both fronts. But the sheer variety of ceramic tiles is endless, which can make finding just the right tile very difficult. 

Because ceramic tends to cost less than porcelain and is much lighter, it’s often used for wall and ceiling installations. However, there are some major cons to this material, too: It’s not as strong as porcelain, so it doesn’t make the best walking surface. It can be very cold underfoot in the winter, and heavy tile can be difficult to install. 

Curious if ceramic tile will work in your bathroom? Here’s what you should know before making the purchase. 

The basics: Ceramic tiles are wide ranging; all are generally made from red or white clay that’s been fired in a kiln and glazed or finished. If you’re a tile nerd like me, ceramic tile technically includes porcelain tile too, but for this ideabook we’ll exclude that category. 

Cost: Ceramic tile is often priced below $2 per square foot. Higher-end tiles can easily run $20 to $40 and more per square foot. The average tends to be around $7 to $9 per square foot. 

Pros: Ceramic tile can be incredibly affordable, and there’s a ton of variety in styles, colors, finishes and textures. It’s also easy to customize it for details like chair rails, soap dishes and special edging and nosing, as in this bathroom.


Cons: Ceramic tile is not as strong as its cousin, porcelain tile, but what it lacks in strength, it makes up for in price.


Special considerations: Since ceramic tiles often have texture, you may want to consider this to add dimension to your bathroom. The eased edge on this tile adds a little extra something to a bathroom wall, but can make it difficult to figure out how to cut end tile. Consider using a tile edge profile, like a Schluter strip, to make the transition less awkward. 

However, today’s ceramic tile offers much more than an eased edge. This wavy tile from Porcelanosa is just one example of the texture and detail available today. 

This type of tile can make for a great accent in a bathroom, but I’d avoid using too much texture in a shower , since it can make for difficult cleaning. Try using it for a feature wall or feature corner instead. 

Maintenance: Make sure you choose a ceramic tile with a durable finish. How can you tell? Buy a sample, take it home and clean it to death. 

I recommend cleaning ceramic tile with a white nylon scrub brush and a little soap. You shouldn’t need much more than that. Ceramic is very durable, but it’s best to stick to mild household detergents and to spot test before using anything new. 

Installation: Installing ceramic tile is pretty straightforward; it could even be a DIY project if you have some experience working with tile. Many of today’s ceramic tile actually has directional arrows on the back side; make sure you keep them lined up the same way so you get the correct look. 


Bathroom Design: Getting Tile Around the Vanity Right

Bathroom Tile Around The Vanity

Article By: John Whipple, Houzz

Tiling under your new vanity or custom cabinets can prevent shower or sink water from finding its way into your house. Extending tile all the way under freestanding or floating vanities can make a room look and feel larger, too. These vanities are popular choices in today’s bathrooms, so it’s important to understand the pros and cons of bringing tile all the way under your bathroom storage. 

See how these bathrooms combine vanities and floor tiles, and learn what you should specify when working with your bathroom contractor. 

Photo by ChaletLook for bathroom pictures

Traditional Bathroom by Denver Architects & Designers Chalet 

Making sure the floor is perfectly level is an important step for a vanity like this. Trying to level a vanity after tile installation can be a real chore. If you’re having a vanity custom built, designing adjustable legs can help get your vanity and vanity top perfectly level. 

Tip: Consider omitting extra legs in custom vanity designs and securing the vanity to the wall if needed. Getting eight legs to sit perfectly flat is much harder than four! 

Photo by Cinder Creek ConstructionDiscover bathroom design inspiration

If your bathroom floor is a little unlevel and you don’t want to spend the money or time making it perfectly level, a little shoe molding (the small strip of molding at the bottom of the vanity toe kick in this photo) on your vanity can visually even things up. Shoe moldings add a lot of charm to a vanity’s look and help protect the vanity from water damage. 

Tip: If you are going to use a shoe molding, plan to shim the vanity off the ground by about ⅛ inch or so, so that the only wood in contact with the floor is the shoe molding. If there’s ever a leak in your bathroom, the shoe molding, rather than the bottom of your vanity, will absorb the damage. It’s much easier (and more affordable) to replace shoe than the entire vanity.

Photo by Erica George Dines PhotographySearch bathroom design ideas

I love how this vanity has higher legs and extra foot room. Traditional bathroom and kitchen cabinets often have a smaller kick space (the little recess below the bottom drawers) with little to no room for your toes. If you like to get up close to your vanity and lean toward the mirror when getting ready, a freestanding vanity with extra leg height is a great idea. 

Tip: If you’re installing radiant floor heating, you’ll want it to go all the way under your vanity with a design like this. That way your feet will still stay warm when you’re up close to the mirror. We prefer cable heating systems rather than heating maps for this very reason; they allow for greater heat placement control.

Photo byLook for bathroom pictures

If you love open space, a floating vanity can help visually expand your room. Sometimes a vanity needs to float due to a room’s heating needs. In-floor heating requires a freestanding or floating vanity (rather than a fixed vanity) to avoid overheating.

Photo by ROSEMARY MERRILL DESIGN – More bathroom photos

Tiling under your vanity can help seal up any voids that might collect water and harm your home’s construction. Sink and drain lines can leak if not properly installed or prepared, and often this leak runs down the back side of a vanity and into the floor. 

Tip: Make sure all your water supply lines have trim collars inside the vanity. These collars act like little water deflectors and can keep water from running back along a pipe and into the wall. 

Photo by USI Design & RemodelingBrowse bathroom ideas

In a larger bathroom, the high cost of tile could be a big factor when you’re deciding whether or not to tile under a vanity. Usually we order a 10 percent overage in bathrooms, but for some large bathrooms I’ll just order 5 percent and use the off cuts under the vanity. This allows the client to get the benefits of tile under their vanity without added cost.

Tip: If your tile is crazy expensive, consider using a cheaper, similar tile under the vanity. No one will know but you.

Photo by REFINED LLCBrowse bathroom photos

Larger vanities with a solid countertop like this can add a lot of weight to a tiled floor. If you’re aiming for a similar look and style, considered the added weight your vanity will bring to the room and make sure your contractor prepares the floor for this kind of installation.

Tip: Curious if your floor is strong enough? Try this simple test for excessive floor deflection: Fill a drinking glass to the top with water, place it in the room before tiling and walk around the room. Move the glass to a few different locations and walk around each time. If the water spills from the glass anywhere, the floor most likely has too much bounce and might not be suitable for a heavier vanity.

Photo by RW Anderson HomesSearch bathroom design ideas

Adding some light under a vanity makes for a great night feature and brings another layer of lighting to the room. Some tile is so shiny that it acts like a mirror under the vanity, so make sure that the bottom of your vanity is not littered with job tags, addresses or overspray from finishing.

Tip: If you want a more even glow from the lighting, consider shining the light toward the back wall instead of straight down. This creates a little less light but a more even glow.

More:Bathroom Design: How to Pick Out a Vanity

See more from Houzz.

Why Bathroom Floors Need to Move

Article By: John Whipple

“Tenting” is a terrible word to a tile professional. When a bathroom floor has been installed incorrectly, tiles can press against one another and pop up off the floor, creating a tent shape. It’s not just tile that does this — almost every material in a home expands and contracts with time, including the plywood subfloor, which can develop popped tiles or cracked grout joints.

These professional pointers for preparation and installation techniques can help keep your bathroom floor from tenting.

Avoid large-format tile. More grout joints allow for minor movement and spreading out.

If you have a large bathroom — like this beautiful space — with loads of natural sunlight, a smaller and lighter tile is definitely a safer option. Darker tile absorbs heat and expands and contracts more than lighter tile.

Contemporary Bathroom by New York Architects & Designers TURETT COLLABORATIVE ARCHITECTS 

All of a home’s building materials expand and contract; the hardwood floor, the tile and even the countertops all move over time. Any good pro should know how to account for these size changes and prevent expansion from wreaking havoc in a home.

Tip: Make sure your tongue and groove subfloor does not get filled with dust, debris or adhesive mortar (thinset). This subfloor needs the ability to move, and the joints should not be too tight.

This photo shows some great tile work. The beautiful tile is nicely lined up, but I especially appreciate how there’s no mortar or thinset where the tile meets the wall. Using mortar here can lead to tenting issues, since it prevents the tile floor from moving and expanding. This clean finish is exactly what you want to see in your bathroom. Make sure your tile contractor understands that you don’t want your installation done with thinset on the edges that meet the wall.

If you drive over bridges frequently — like I do every day — you’ll notice that bridges have expansion strips. During the summer the bridge is quiet, since summer’s heat has expanded the bridge’s concrete and the expansion strips are pressed tight. But in the winter, driving over the same bridge sounds quite different; the expansion strips are wider, and they click-clack as your tires hit them.

Designing tile floors to expand and contract follows some of these same principles. Uncoupling membranes underneath floor tile can improve your floor’s flexibility. This photo shows a professional installing a Strata Mat uncoupling membrane to account for minor floor movement.

Hearing a hollow noise when you’re walking across newly tiled floors could be the early signs of tile bond failure. This sound results from poor thinset coverage.

In this photo the floor tile goes underneath the tub skirt. This is a solid design that allows for movement on the floor tile.

Tip: Gently tapping set tiles with the wooden handle of a rubber mallet can help you find the hollow noise where poor thinset coverage has occurred.

Modern Bathroom by North Vancouver General Contractors John Whipple – By Any Design ltd. 

All steam showers have a modified thinset to account for quick thermal expansion. The powerful steam and heat in steam showers require a thinset that can accommodate immediate expansion and contraction.

Glass expands more than many other building materials. Large panels like these let in lots of sunshine and quickly heat up the bathroom, increasing thermal expansion.

For an installation like this, I’d make sure that the corners of the shower stall had two layers of a waterproofing membrane. Products like NobleSeal TShave a thicker membrane that can take some compression in the corners.

With extremely large bathrooms, expansion strips inlayed into the tile assembly are a must. In my opinion, any room larger than 15 feet in one direction should be using some kind of expansion strip and specialty thinsets and grouts to increase expansion and combat mortar fatigue.

ConsumerReports.org Buying Guide: Flooring

vinyl wood flooring

Getting Started

Begin by considering where the flooring will go and how much traffic, sunlight, and other wear and tear it will get. Vinyl proved tops in our moisture tests and most linoleum. Plastic laminates, and solid wood fared nearly as well. But many engineered woods, as well as some solid woods, and a linoleum product we tested flubbed that test – a serious drawback in a busy kitchen. And while the best vinyls and plastic-laminates fended off wear better than solid wood, they can’t be refinished when worn. 

How to Shop

Before settling on a product, spend a few dollars on two or three samples. That can be a lot less expensive than winding up with flooring that looks great in a catalog or on a website and then awful in your home. Manufacturers generally match most wood or engineered-wood flooring for color or grain. But variations can occur from one batch to the next, so buy the flooring you’ll need all at once. All the plastic-laminate floorboards in a package often have a similar pattern, so you may want to pull from multiple packages to avoid repetition.

To determine how much flooring you’ll need, measure the room’s square footage by multiplying its length times its width. (Divide an irregularly shaped room into smaller rectangles, calculate the square footage of each rectangle, and then add them together.) Then buy 7 to 10 percent extra to allow for mistakes, bad samples, and waste. You might also want to invest in an extra box of flooring for future repairs or additions. 

Where to Save

One way to save is on overstocks. Also, take advantage of mistakes. You can often save on opened or damaged boxes or on flooring with minor flaws that no one will notice.

Hiring a pro to do the installation? You can trim hundreds of dollars off the job by doing the time-consuming prep work like prying up the old flooring, leveling or filling the subfloor, and removing any baseboard that’s in the way. 

Green Floors That Didn’t Cut It

Bamboo is considered renewable because it’s a fast-growing grass. The best bamboo floorings we tested area stranded products such as the EcoTimber solid and Teragren engineered flooring, which are made of fibers that are shredded and compressed for strength. Cork floors are made of tree bark in a process that doesn’t kill trees.

Know How Rough You’ll Be

The best products in every category were also the best overall in our simulated foot-traffic tests. For less busy kitchens, you may want to consider the top engineered wood or bamboo, with its blend of natural veneer and easy installation.

Pick a Factory Finish

Prefinished wood and bamboo floors cost about 40 percent more than unfinished products. But you’re likely to save overall because a factory finish tends to last longer-and paying a pro to apply the finish adds costs, mess, and hassle. Factory finishes are also warranted by the manufacturer. 

Check for Certification

Vinyl floors with the industry’s FloorScore certification emit relatively low levels of volatile organic compounds, substances linked to health problems and pollution. All vinyl we recommend has that certification. For wood flooring, certification by the Forest Stewardship Council and the Sustainable Forestry Initiative offers some assurance that it comes from responsibly managed forests, a plus for the planet. The product and manufacturer must be certified; check the packaging. 

When You Get it Home

Before installing wood or laminate flooring, unpack it and let it sit for one to three days in the space where it will be installed so that its temperature and moisture match the levels in the room.

Keeping New Floors Looking Good

If you need to heat the room soon after installation, raise the temperature gradually over the course of a week – especially if you have radiant heat – to allow the flooring to adjust. Sweep or vacuum floors with a soft broom or brush, and clean with a damp but not overly wet mop. Check the manufacturer’s guidelines for recommended cleaning products. And put felt pads under furniture to prevent scratching. 

Types of Flooring

Though you’ll find a growing array of styles, most flooring falls into one of these six types. The type of flooring you choose will depend on your taste, needs, and budget.

  • Solid Wood
  • Engineered Wood
  • Plastic Laminate
  • Vinyl
  • Linoleum
  • Ceramic Tile

Flooring Features

Different flooring materials require different installation techniques. Homeowners install about half of all flooring. Floated floors that go down without glue or fasteners are easiest. In the case of vinyl, planks or tiles; they are easier to install than sheets. 

  • Nail- or Staple-Down Installation: These are the methods of choice with solid wood and engineered wood over a wood subfloor. Standard, ¾-inch-thick solid-wood strip and plank flooring is traditionally nailed to the subfloor; thinner solid or engineered material is almost always stapled. The fasteners are usually driven diagonally through the tongue side of the material and into the subfloor (blind-nailed) so they are invisible once the floor is finished. Solid flooring can also be nailed straight through the surface (face-nailed) with decorative cut nails or fastened with screws, which are typically countersunk and concealed with wood plugs. Installers often sandwich a layer of 15-pound felt or rosin paper between the subfloor and floor to prevent moisture between the two and to deaden sound.
  • Floating Installation: This works with engineered wood, plastic laminate, linoleum and some ceramic tile over a wood or concrete subfloor or existing flooring. Tongue-and-groove planks or tiles lock together mechanically. Some products must also be glued together at the joints. The material generally goes over a thin foam or cork pad, which fills minor flaws in the subfloor and absorbs sound. Installations over concrete require a thin plastic vapor barrier.
  • Glue-Down Installation: Engineered wood, vinyl, linoleum, and tiles are typically glued. You trowel adhesive onto a clean, flat, wood or concrete subfloor or existing flooring and lay down the sheets, planks, or tiles. No vapor barrier is required. Some glue-down flooring is simply peel-and-stick, the easiest to install. You’ll also find vinyl flooring in sheets and easier-to-install tiles.

Copyright © 2006-2012 Consumers Union of U.S., Inc.