By Erin Carlyle, Houzz
A new sink can give your kitchen a fresh look. But sinks get a lot of use, and they’re not made of Teflon, so over time they’re bound to show some wear and tear. Here are tips for keeping 10 popular kitchen sink materials looking great.
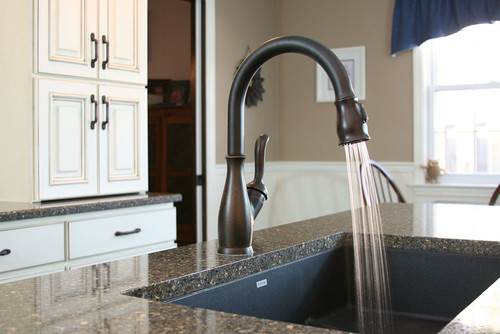
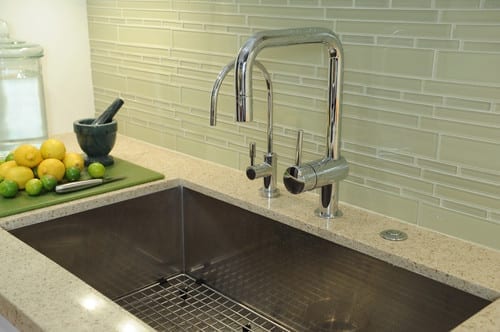
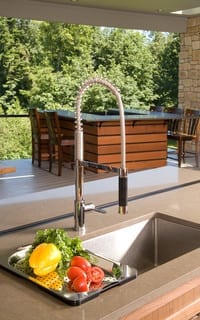
1. Stainless Steel
Basics to know. Easy-to-maintain stainless steel is the most popular choice for a kitchen sink, according to the majority of the designers I interviewed — and with good reason. “A stainless sink is very hygienic,” says Andrew Williams of Andrew Williams Designs in Boulder, Colorado. “There’s not anything in there where bacteria can grow.”
Stainless steel isn’t indestructible, but it’s about as close to that as a sink can get. Still, stainless is prone to scratching through daily use. Hard water also can be a problem, with marks showing more on mirror-finished stainless, seen with very high-end sinks, than on brushed, or satin, finish, which is the more common finish for these sinks. Also, if something extremely hot touches a dry stainless sink, the material can become discolored in a process known as “blueing,” Williams says.
Cleaning regimen. To keep stainless sparkling, wash the sink regularly with mild dish soap and a sponge or soft rag — that’s it. “You don’t have to worry yourself with a lot of daily maintenance,” Williams says. Alternatively, manufacturers recommend using a stainless steel cleaner or polish about once a week.
When you clean your sink, avoid using steel wool, wire brushes or abrasive sponge pads, as they can cause the material to scratch. Also avoid cleaners that contain bleach, as they can corrode the sink. And if you do for some reason use a cleaner with bleach, be sure to rinse the stainless surface immediately to prevent corroding.
How to protect it. To keep stainless looking great, you may want to keep a grid on the bottom to protect it from scratching during daily use. If your sink gets water marks from hard water, a mixture of vinegar and water may work to remove the marks. Don’t allow water to evaporate on the sink, or this may lead to more water
marks. Instead, after you use your sink, wipe it dry with a soft cloth to prevent water stains. And to prevent blueing, be sure to always add water to the sink before putting a hot pan in — never put a hot, dry pan directly in the sink.
How to repair it. If your stainless steel sink does get scratched, you can buff out the scratch with steel wool. But do keep in mind that buffing doesn’t actually remove a scratch; it smooths the sink’s surface so the scratch is not in dramatic relief but instead blended into a larger buffed area. This works best on satin or brushed finishes. A buffed area will stand out more on some of the higher-end stainless sinks that come with a shiny, mirror-like finish.
If you dent your stainless sink — something that might occur if you bump a cast iron pan against its side, for instance, or drop a heavy object on the sink bottom — there’s pretty much nothing you can do, and your sink will have a dent, Williams says. But to put this potential problem into perspective, consider that a ceramic or enamel sink placed under the same pressures would chip.
2. Granite Composite
Basics to know. Granite composite sinks are typically made of 80 percent granite and 20 percent acrylic resin, which makes them an extremely durable material. They are resistant to heat, stains, scratches and chips. This material comes in a range of colors (though only in matte finishes), but be aware that lighter composites can stain, while darker colors camouflage food scum best. Granite composite doesn’t show scratches the way stainless steel does and the colors don’t fade when exposed to high heat. But these sinks are prone to stains from waterborne minerals, which can dull the finish over time. These sinks can work with a range of kitchen styles, “from cottage to more contemporary,” says Heather Kirk, of Kirk Riley Design in Seattle, Washington.
Cleaning regimen. You can clean daily with a mixture of mild soap and warm water, Kirk says. Alternatively, you can use a non-abrasive cleaner like Bar Keepers Friend, Soft Scrub or Soft Scrub with bleach. Simply scrub any marks or stains with the sponge and soap or cleaner, then rinse with water. After cleaning and each use, be sure to dry the sink with a towel. Kirk recommends microfiber, which is more absorbent than a regular towel. “Yes, this is an additional step, but it will help prevent water stains or limescale from building up on the surface,” she says.
Despite your cleaning, over time the matte finish of a granite composite sink may dull and begin to look as though it is coated in a hazy film, due to buildup of dirt from daily use, or mineral deposits from hard water. A white ring of calcium deposits may appear around the bottom of the sink. To remove these blemishes, use a cleaner targeted at stains from hard water and mineral deposits, such as Lime-A-Way or CLR.
To help prevent this buildup as well as to rid the sink of stubborn stains, some sink manufacturers recommend deep cleaning monthly by sprinkling a mild household cleaning product around the sink bowl and adding hot water (140 degrees Fahrenheit). Let the water stand at least two hours and up to overnight. Drain, clean the sink with a sponge and wipe dry. “This should remove any discoloring from food or limescale residue,” Kirk says. Alternatively, you could leave a solution of half bleach, half water in the bottom of the sink for an hour, then scrub and rinse well.
How to protect it. Follow your sink manufacturer’s recommendations when it comes to deep cleaning. Straight bleach or products that contain ammonia are typically not recommended. For daily cleaning, avoid using steel wool or abrasive scrub pads, as these can scratch the sink.
How to repair it. Granite composite sinks are resistant to stains, chips, scratches and burns. Marks from metal pans can be removed using the rough side of a sponge along with a mild cleaner — dish soap or a household cleaner should be fine in most cases, but check the sink manufacturer’s recommendations first.
3. Fireclay
Basics to know. Fireclay sinks are made from a mixture of clay and glaze fired at temperatures of at least 1,600 degrees Fahrenheit, resulting in the clay and glaze fusing together to create a durable, ceramic-like finish. This material is non-porous and highly resistant to scratching or chipping. Though they are generally stain-resistant, designer Lauren Davenport, of Davenport Designs in Atlanta, recommends rinsing a sink thoroughly after placing red wine, coffee or tea bags in it, as they can leave a mark on the sink. You can place hot pans and dishes in the sink without fear of damaging the material. These sinks are often apron-front and found in farmhouse-style kitchens.
Cleaning regimen. Use mild dish soap and a soft cloth or sponge to clean fireclay sinks of daily messes. For heavier, crusted-on messes, apply baking soda or a mild abrasive cleaner to a sponge or soft cloth and clean off the gunk. Rinse thoroughly and dry with a soft cloth to prevent water spots.
These sinks often have flat bottoms and food can accumulate in the sink’s corners. When this happens, you can use a plastic spatula or a soft scrubbing sponge to scrape off this food muck. Applying a liquid wax to the sink once a month will help with proper drainage, particularly useful for flat-bottomed sinks. “It can help with water flow and helping prevent the water from pooling in the corners of the sink,” Davenport says.
How to protect it. Using a sink grid can help prevent scuff marks that may come from pots and pans. Take care with heavy cast iron pans; if you whack the sink hard enough with cast iron, the sink body could crack.
How to repair it. These sinks will not scratch, burn or crack during daily use. If you do see what looks like a scratch in a fireclay sink, it may be a metal mark left from silverware; these can be cleaned with a scrubber. Chips are rare, but if they do happen, you can get a repair kit from your manufacturer. Davenport says you should follow the instructions on the kit precisely, then avoid using the sink for a week so the compound can fully cure.
Also important: “When comparing fireclay sinks to other sinks, know that the only available finish is in white,” Davenport says. “While these sinks are very durable, dishes and glasses that are dropped into these sinks tend to shatter more easily.” Also, fireclay sinks are very heavy and will require extra reinforcement to accommodate their weight.
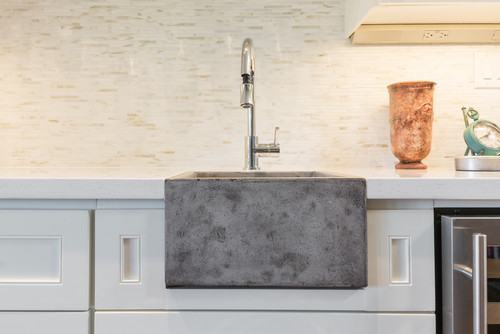
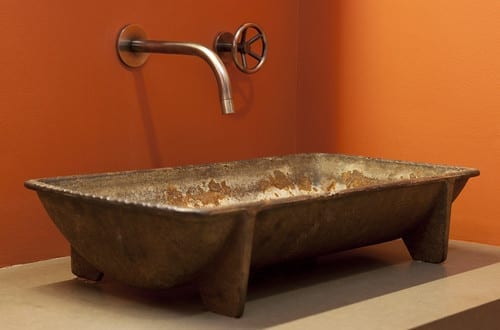
4. Concrete
Basics to know. The most important thing to know about concrete is that it’s fairly porous, and although these sinks will have a sealer, they’ll still show use with time. “When you go with concrete you have to like that worn look, because the material will change,” says Ellinor Ellefson of Elle Interiors in Chandler, Arizona. But you can have a concrete sink custom-made and get it in custom colors. Often used in industrial-style kitchens, these sinks can go with all sorts of countertops. “I have used it with both quartz countertops and granite,” Ellefson says.
Cleaning regimen. Wipe down once or twice daily using a mild dish soap, Ellefsen recommends. Stay away from any abrasive cleaner, as this can wear down the sink’s sealer. Once or twice a week, clean the soap with a household cleaner that is not too abrasive — she recommends checking to make sure that the cleaner is OK to use on natural stone. If not, don’t use it on a concrete sink because it will seep in and start dulling the concrete’s surface.
How to protect it. Avoid placing hot pots and pans directly in the sink; instead, run water into the sink first. The concrete itself won’t be damaged by heat, but the temperature could damage the concrete sealer. You should expect some minor white scratches to appear in your concrete over time; applying Pledge periodically can help fill them in and give your concrete a nice sheen, according to manufacturer Trueform concrete.
Don’t let acidic foods or liquids — lemon juice, mustard, vinegar, wine, soda, tomatoes — sit on your concrete, as they can eat through the sealer and possibly stain the exposed concrete beneath. Similarly, don’t use cleansers that contain ammonia, citric acid, vinegar or bleach.
To keep it looking good, reseal a concrete sink using a special concrete sealer or a concrete wax, Ellefson advises. When the sink is first installed, she recommends waxing frequently the first month, then re-waxing about every six months. Similarly, if a concrete sealer is used, she suggests resealing every six months.
How to repair it. Again, if you choose a concrete sink, you should be prepared to accept some scratches as part of the character of this material. But if they build up and are bothering you, you could have a handyperson skim coat the sink with a fresh layer of concrete, which would effectively give it a new finish. You’d just have to avoid using the sink until it is completely dry and has been sealed. Chips in a concrete sink can be repaired with polyester resin and a putty knife — you can follow the manufacturer’s instructions and do it yourself or contact a concrete fabricator.
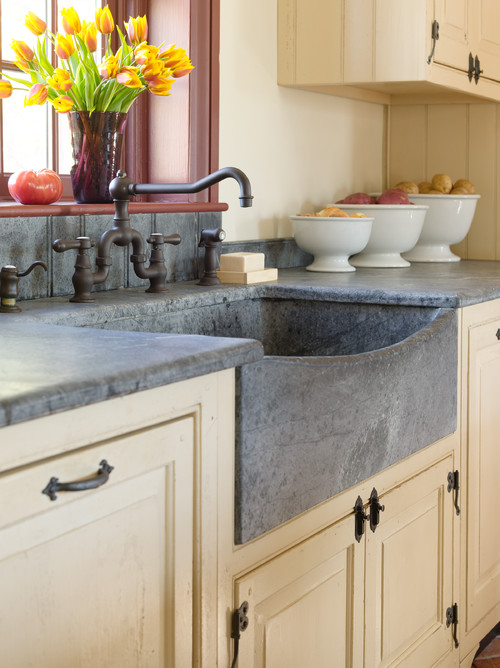
5. Natural Stone
Basics to know. Natural stone can bring a gorgeous organic note to your kitchen sink, but it is not as durable a material as granite composite or stainless steel. While there is a wide variety of natural stones to choose from — including black granite, green or gray granite, limestone, marble, travertine, sandstone, onyx, quartzite and soapstone — some stones are better suited for kitchen sinks than others. Natural stone may scratch or chip, and many stones are susceptible to staining since they are porous. Proper sealant is critical to maintaining the look of these sinks. “A general rule of thumb is that the lighter the stone is, the more porous it is,” says Ellefson, the Arizona designer.
Cleaning regimen. Natural stone can be cleaned with warm water and a soft brush, or mild dish soap and a soft cloth. Alternatively, you could clean with a product recommended for countertops of the same stone material — check with the manufacturer to get a list of such products. With either method, be sure to wipe your sink dry after use or cleaning to help prevent water marks. If your sink does develop stains, try using a non-abrasive household cleaner like Soft Scrub, a dishwasher soap or a professional stone cleaner to remove them.
Your kitchen sink will frequently have contact with water, which can remove the protective sealer, so you’ll want to regularly reseal natural stone with wax or a stone sealant to protect the porous stone from damage or stains. Most tile or hardware stores will carry a variety of stone-sealing products. Check with your manufacturer for recommendations on how frequently you should seal the particular stone you have; once or twice per year is often the recommendation. If you prefer to use wax, you’ll want to apply it at least once per month.
How to protect it. Don’t use acidic or abrasive cleaners, like tub or tile cleaners and toilet bowl cleaners, on the sink. Also don’t use ammonia, vinegar, alcohol, window cleaners or lemon juice on a natural stone sink. Avoid abrasive cleaning tools like steel wool and metal brushes.
How to repair it. If you get a scratch in your natural stone sink, call a repair person. If your sink gets stained, follow the manufacturer’s guidelines to remove a stain.
Also important: Natural stone can be hard on dishes and stemware. “Avoid throwing dishes and glasses into the sink, as they [will] have a tendency to chip and break easier than [in], say, a stainless steel sink,” Davenport says. These sinks are also quite heavy and will need extra reinforcement to accommodate their weight.
Soapstone
Basics to know. Soapstone is distinct from other natural stones because it is not porous, which makes it very stain-resistant. While this stone is known for a rich, dark look, it’s actually light gray in color when it comes from the quarry; the charcoal tone comes from exposure to water, grease or oils that cause the stone to oxidize. “What people like the most about soapstone is the way it looks when it’s oiled,” says Erika Couture of Inspire Kitchen and Bath Design in Colchester, Vermont. Typically, mineral oil is used. But since the water used in a kitchen sink on a daily basis rinses away the oiled finish, maintaining that oiled look in a sink can take some elbow grease. If you don’t keep up the oiling, your sink can end up looking streaky, Couture says.
Cleaning regimen. To keep the sink clean, scrub it with soap or a household cleaner like Ajax or Comet. You can use a small brush to keep the corners of the sink clean.
How to protect it. If the sink is new, you’ll need to treat it regularly with mineral oil to keep it looking good — at least once a month is recommended, but the choice is up to the individual homeowner. A general rule of thumb is to apply mineral oil when water begins to leave a noticeable dark spot, according to Vermont Soapstone in Perkinsville, Vermont. Over time, the soapstone should absorb the mineral oil and you won’t need to continue coating it.
How to repair it. A soapstone sink is not likely to stain because the stone is not porous, and it won’t burn, Couture says. If you gouge or scrape the sink, you can buff out the damage with fine sandpaper. If the sink chips around the edges or corners — perhaps you hit it with heavy dishes — use fine sandpaper to smooth down the edges.
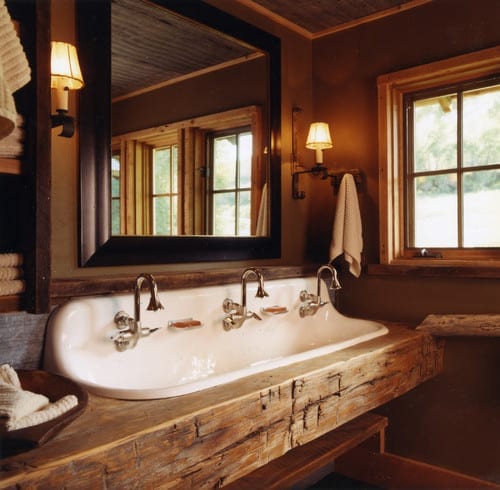
6. Cast Iron
Basics to know. Cast iron sinks have an enamel finish that is fired at 1,200 degrees Fahrenheit. The polished enamel is nonporous, and if the quality is high this material is very durable. However, be wary of lower-quality enamel finishes that may be more prone to chipping. This type of sink can be hard on dishes and glassware, so be careful how you place these items into the sink.
Cleaning regimen. Rinse the sink after use and wipe it down with a soft cloth. You can also use a mild dish soap and a soft cloth or sponge for cleaning. Avoid abrasive cleaners, which can cause the enamel finish of the sink to wear off.
How to protect it. Use a sink grid to protect the sink bottom from scuff marks from pots and pans. Don’t leave dirty dishes, coffee grounds, tea bags or other materials that may stain in the sink for long periods of time.
How to repair it. If you do chip the enamel on your sink, the underlying cast iron may be exposed and subject to tarnishing or rusting. Acidic foods like orange juice can start to damage the sink. Rather than spot-repair chipped enamel, Davenport recommends having the entire sink professionally resurfaced or re-enameled.
Also important: Cast iron sinks are sometimes used in place of fireclay sinks, which tend to be more expensive. But these sinks get mixed reviews from designers. Davenport prefers to use them in bathrooms, where pots and pans won’t damage their enamel finish. On the other hand, Kirk, the Seattle-based designer who specializes in restoring vintage homes, uses cast iron sinks often and finds them easier to repair than fireclay, arguing that if you hit cast iron hard with a pan, it will damage the enamel but not the cast iron, while if you hit fireclay hard enough, you could crack the actual sink body.
7. Copper
Basics to know. Raw copper is rust-resistant and anti-microbial, and a just-bought copper sink will have a glorious glow to it. Raw copper will naturally develop a patina over time. “It’s like a penny: It’s going to be bright and shiny, and then it’s not,” Kirk says. Keep in mind that there are a few types of copper sinks on the market: those that are raw, and therefore designed to patinate; as well as lacquered copper, designed to preserve its bright look; and finally pre-patinated copper sinks, which have patination before you buy them. The care instructions for these types of sinks are essentially the same.
If you’re buying a sink, be sure to choose one that is at least 99 percent pure copper — otherwise you lose the benefits of using copper, “namely its anti-microbial properties as well as its malleable-yet-tough quality,” says designer Jennifer Ott of Jennifer Ott Design in San Francisco.
Cleaning regimen. Clean your copper sink daily with mild soap, warm water and a soft cloth or sponge, then dry with a cloth to prevent water spots. It’s best not to use abrasive cleaners or tools like steel wool.
The development of patina is a natural process with copper, but if you want to try to intervene in the look of your sink, there are some steps you can take — you will just need to be ready to take on some work. You may want to apply a product that can help prevent water spots, especially if you have hard water that could leave mineral deposits. One option for protecting the sink from such spots is a spray wax applied once per month.
Too much moisture can lead to green spots in your copper sink’s patina; this is a mineral buildup that you can remove with your fingernail or a soft cloth, or with warm water and a sponge. Some soaps may also cause green spotting if they sit on the sink’s surface for too long. Sometimes these sinks can also get a brown film; similarly, it can be wiped off with a cloth or scratched off with a fingernail. For some people, none of this is really a big deal — others will find staying on top of the development of patina an annoyance.
How to protect it. Don’t leave a rubber mat, sink grid or sponge inside the sink, and don’t leave food or dishes in the sink for a long period of time, as all of these items can stain the sink. Don’t let bleach touch the sink; it will remove the patina. Acidic foods like citrus, tomatoes, ketchup and soda also can strip the patina from your copper sink. So can cosmetics and toiletries like toothpaste, makeup or shaving cream, as well as abrasive chemicals like bleach or drain unclogger. Even oil from your fingertips can affect the patina on copper. Some manufacturers make sink grids that work specifically with copper and don’t take off its patina; consider one of these to protect the sink.
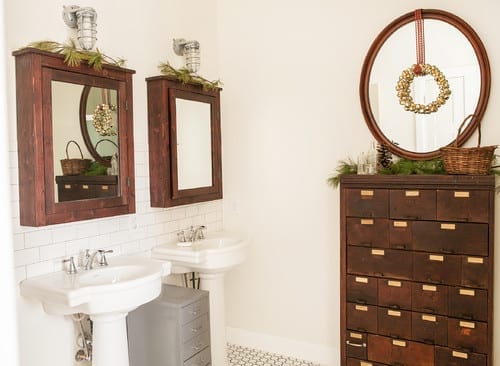
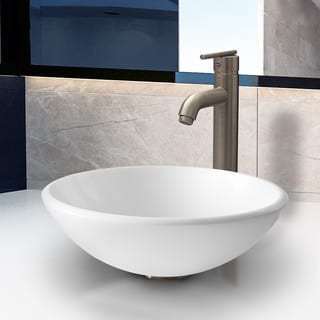
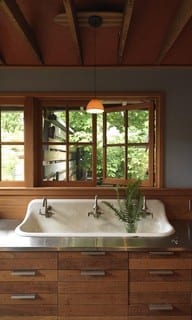
8. Porcelain
Basics to know. A white porcelain sink can look great with a farmhouse style, especially when it’s new. But the look of these sinks will degrade over time. “No matter what you do, a porcelain sink will become scratched and the finish will get dull,” says Ellefson. “You can try to be careful, but there’s really no way to keep it looking as pristine [as it was] in the beginning.” Porcelain sinks can chip, and metal pans can leave black marks or scuffs that can be difficult to remove. Porcelain isn’t as durable as fireclay, and it isn’t as popular a sink material as it once was. “It’s still used, but mostly when farm sinks are in play,” says Angie Keyes, a kitchen and bath designer in Naples, Florida. These days, porcelain is more commonly seen in bathrooms.
Cleaning regimen. Wash your sink on a daily basis with warm water and dish soap, and use a semi-soft brush to scrub it. Wipe your sink dry to prevent water stains. If the porcelain starts looking dull or dirty, sprinkle a little Borax laundry detergent in it, then rinse that with water. The Borax will help take off mineral deposits that build up and dull the sink’s finish. For a deeper fix, you can get the porcelain sink refinished — hire a professional to do this.
How to protect it. Ellefson advises keeping a rubber mat at the bottom of your porcelain sink to prevent scratches.
How to repair it. To repair a chipped or cracked porcelain sink, you can purchase a porcelain repair kit and follow the directions — but the look may not be completely smooth. Alternatively, you can have your porcelain sink professionally refinished.
9. Solid Surface
Basics to know. Solid surface sinks are man-made, synthetic material composed of acrylic or polyester resins, powdered fillers and pigments — Corian is one brand name. Sometimes people also refer to engineered quartz as solid surface, but engineered quartz is a distinct material made of naturally occurring quartz chopped up and mixed with a resin-like material, similar to the process for forming composite granite (see next sink description). Solid surface sinks are supposed to be stain-free, but they do actually stain, says Couture, the Vermont designer. Dark cast iron pans, blueberries and anything that sits on the sink for a while can leave a mark.
Cleaning regimen. Rinse thoroughly and wipe dry with a soft cloth after each use. Alternatively, wash the sink with soapy water before drying. Mild abrasive cleaners like Comet or Bon Ami can be used occasionally to scrub down the sink, and stains can be sanded down with fine sandpaper. “Be careful not to do it in just one area” or the sink will show a depression in that area, Couture says.
How to protect it. Don’t leave dirty dishes, coffee grounds, tea bags or other items that could stain in contact with the sink for a long time. Use a basin rack to protect the sink’s bottom from scratching.
How to repair it. Solid surface sinks can be damaged by heat. If you pour boiling water in without first warming the sink up by running hot water on it, the bottom of the sink might drop out, Couture says. You also want to make sure you avoid placing anything very hot straight out of the oven and onto the sink, or the hot item could melt the material, Couture says. If your sink has a crack or burn that needs to be repaired, call a professional. Synthetic solid surface sinks can be lightly sanded with very fine sandpaper to remove stains or scratches, Couture says. “But because it is soft, you don’t want to oversand in one spot or you will create a depression in that one area.”
Also important: Avoid using window cleaners on the sink, as they can leave a waxy buildup that may dull the sink’s finish.
10. Engineered Quartz
Basics to know. Engineered quartz, also called quartz composite, is a blend of ground quartz and resin. Similar to granite composite in terms of the way it is made, engineered quartz is non-porous and resistant to scratches and heat. This material comes in a variety of colors and, like most sinks, can show hard-water marks if not properly maintained. Force or pressure from heavy objects can damage its surface. On the downside, engineered quartz is not quite as strong or scratch-resistant as granite composite. “Until recently, quartz [composite] sinks were only available as a custom integral sink in a quartz [composite] countertop,” says designer Barbra Bright, of Barbra Bright Design in San Francisco. However, these sinks are now available as standalone products.
Cleaning regimen. Wipe clean with soap and water, and the scrubber side of a sponge. To clean off tougher spots and dirt, use a non-abrasive household cleaner like Soft Scrub Liquid Gel. To remove food or other items that may stick to the sink, scrape with a putty knife and then clean the sink’s surface with a damp cloth. As with many sinks, wipe dry after use to avoid developing mineral deposits from hard water. For tougher stains on lighter-colored engineered quartz, use a product such as Bar Keepers Friend, Bright suggests. Also, you’ll want to be sure to clean the sink on a regular basis to avoid developing a haze from everyday cooking greases and oils. “Some of the designers say they use Magic Eraser on them daily,” says Cindy Aplanalp-Yates of Chairma Design Group in Houston.
How to protect it. Though this material is heat-resistant, it can be damaged by sudden, dramatic changes in temperature, so avoid transferring hot pans directly into the sink. Instead, run warm water to acclimate the sink first.
How to repair it. An engineered quartz sink that gets a crack or divot in it could be repaired by filling the damage with epoxy, Bright says, but the patch method might be visible, depending on the color of the sink. The best course of action would be to call a professional — either the fabricator who initially installed the engineered quartz or a stone repair company.
Originally published on Houzz: How to Keep Your Kitchen Sink Looking Great