FREE DESIGNS AND ESTIMATES

Kitchen Evolution: Work Zones Replace the Triangle

Article by:

When I began studying kitchen design many (many!) years ago, I learned all about the much-venerated kitchen work triangle — in which the refrigerator, range and sink are placed 4 to 9 feet apart, forming a roughly equilateral triangle. This design principle was developed back when most people had smaller, closed-off kitchens, where only one person prepared and cleaned up meals. It’s an efficient way to lay out appliances and the sink in a small closed or semiclosed kitchen. 

The work triangle is still useful today, but with kitchens that now run the gamut from tiny single-wall galleys up to large open-plan kitchens, it’s more useful to think in terms of work zones instead.

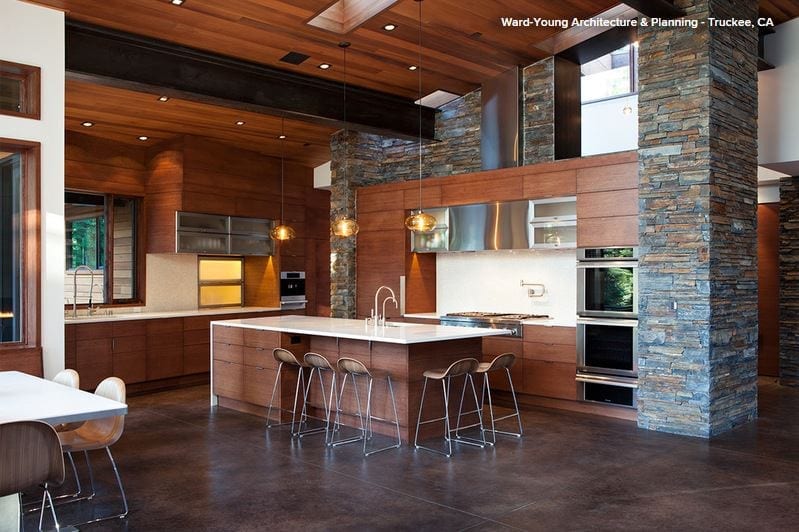
Work zones are really just the natural evolution of the kitchen work triangle. As kitchens grew in size and opened up to other rooms in the house, it became more of a challenge to place appliances in a neat triangular layout. We also have more appliances than ever before — dishwashers, extra sinks, microwaves, separate cooktops and wall ovens — not to mention more people working and socializing in the space. By sectioning off your kitchen into work zones, you’ll maximize efficiency in a larger space; more cooks, as well as their guests, will be better accommodated.

Group appliances and fixtures according to use.To set up work zones in your kitchen, think of the tasks you perform regularly: storing food, prep, cooking, baking, serving, eating, cleaning, making coffee, chilling wine etc. A work zone contains everything you use to perform each task. 

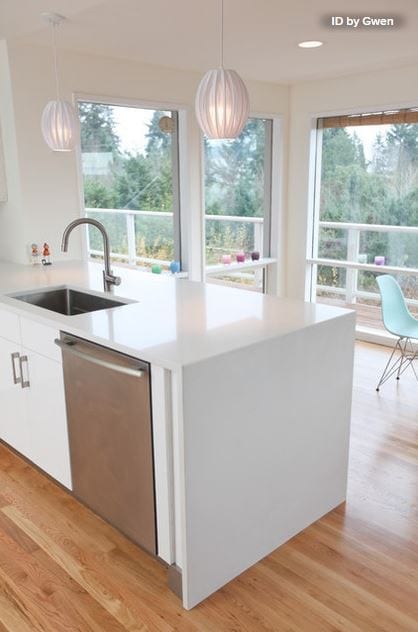
For instance, you should place your dishwasher next to your sink, with a compost bin and a garbage bin nearby to streamline kitchen cleanup.


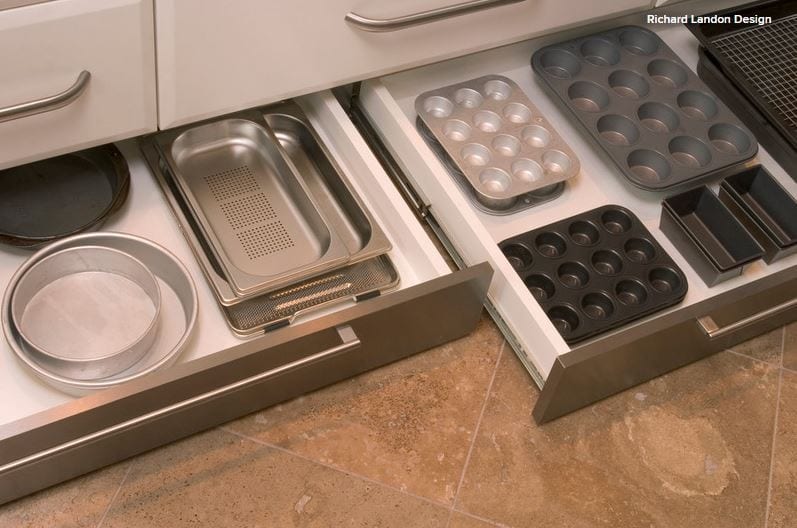
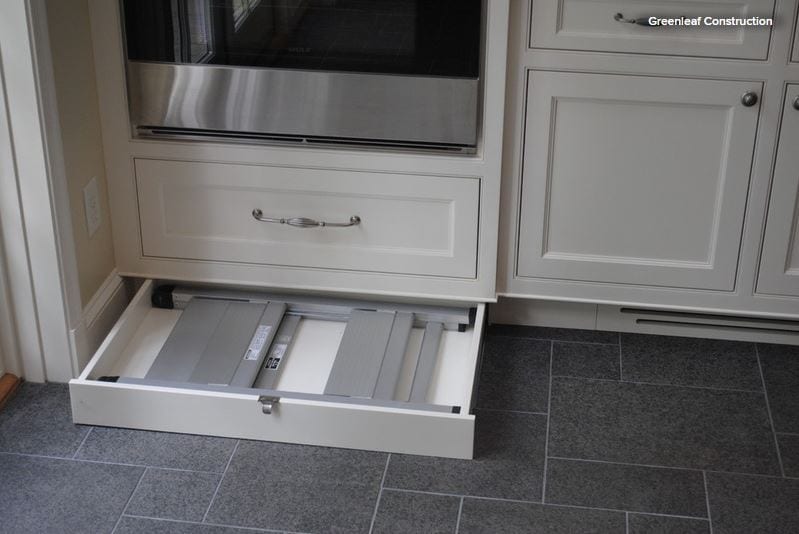
Store what you need where you need it most. In addition to grouping appliances and fixtures according to use, give yourself enough storage in each zone for what you need to perform the task. 

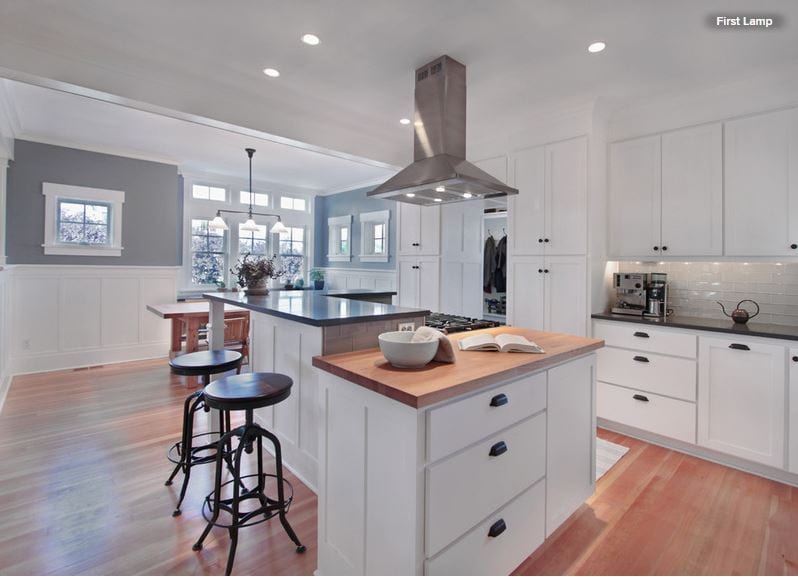
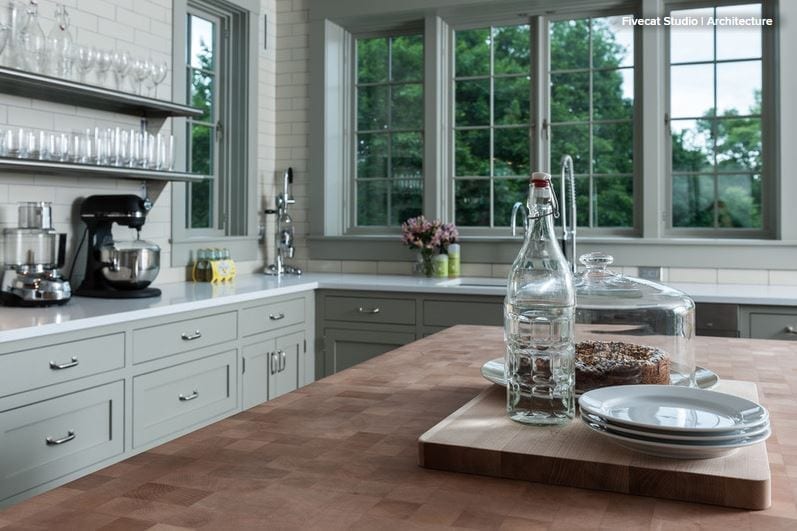
This wood-topped baking zone is perfect for kneading bread or rolling out pizza dough. All the bread-making and baking tools can be stored in the cabinets below. Someone can easily work at this station while another person prepares food in another part of the kitchen.

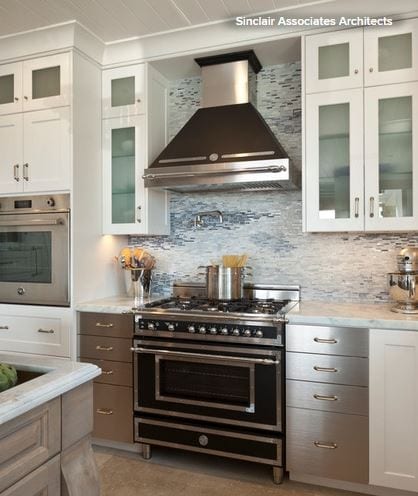
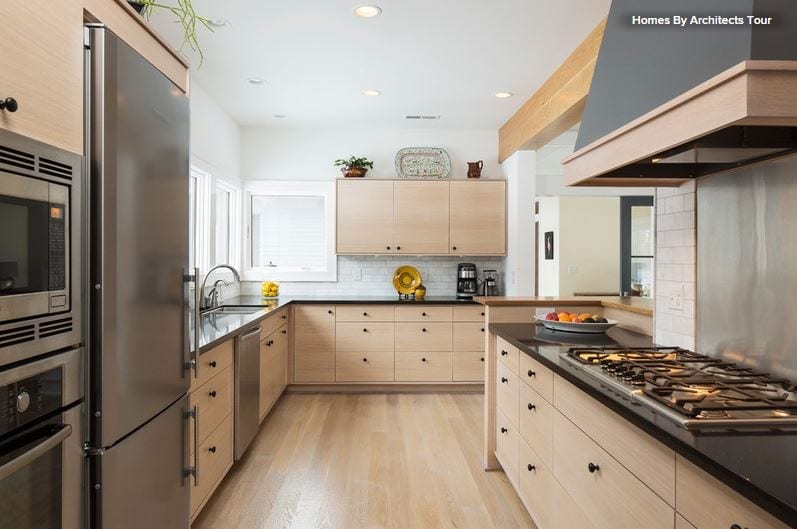
Provide landing areas next to major appliances.For safety and efficiency, consider placing a countertop landing area next to your major kitchen appliances, especially the range, cooktop, microwave and wall ovens. 

You want to be able to quickly set down something hot without having to trek halfway across your kitchen. This will also give you a cooking work zone; you can store items like knives, cutting boards and pots and pans in the cabinets and use the countertops for chopping and cooking prep.


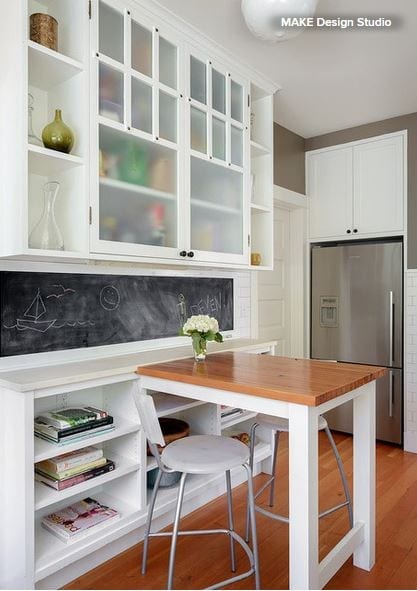
Create a kids’ zone. If you have children and a good-size space, set up an area in the kitchen where the kids can hang out, do homework and eat snacks. This will allow you to all be in the kitchen together without the little ones getting underfoot.


Consider a zone for guests. If you have an open kitchen and like to entertain often, you know how important it is to have an area where guests can hang out and chat while you prepare food and drinks. A large island or peninsula works well for this, since it can act as a barrier that keeps visitors from getting in your way while also giving them a place to perch while you work. Again, think about the items you use for serving and entertaining, and store them in the cabinets below so you can easily access them.

Widen the aisles. Whether you opt for the traditional work triangle or to break up your kitchen into work zones, pay attention to your kitchen’s aisle widths. The recommended minimum aisle width is 42 inches, but I prefer 48 inches, especially in kitchens with multiple cooks. If you cook and entertain often and have the space, you could go as wide as 54 inches. Wider than that, though, and your space will likely become inefficient, as you’ll spend more time walking than cooking. 

What to Know About Budgeting for Your Home Remodel

Article by:

The budget conversation — it’s sometimes awkward, often slightly uncomfortable and usually comes with a bit of anxiety. Because of the nature of construction, things often cost more than what homeowners think. There are endless debates on why that is, but the result is that we designers often have conversations with clients that end with an awkward silence. The silence usually means that certain aspects of their project might be out of their reach. And truth be told, we really don’t like being the messenger in these conversations. We want our clients to be satisfied with the process and get what they really want. 

But the flip side of that conversation is that budget constraints can make a project better. Just hear me out. What we find is that financial considerations make our team and clients focus on what’s really important. That pressure helps edit down the myriad choices and allows a more coherent story to emerge. And it all comes back to sticking to that budget. Here’s how.

Establish Your Budget Early

We have been in situations where clients have not told us their budget until we have completed some of the initial phases of work. This, no surprise, can slow down the process. It’s like going to a personal trainer but not telling them how much weight you can lift, and so you spend time trying a few exercises to figure out what the proper weights are. 

There are situations where homeowners generally don’t know what a new custom home or addition will cost, but a key part of the process is considering how much you would be comfortable spending on the project. Obviously spending $50,000 will produce a dramatically different result than if you spent $500,000. And what you spend will be influenced by a wide variety of factors, including neighborhood, type of project and level of finishes.

Without knowing a budget range, we could get through the first few meetings with clients and then give them a rough ballpark figure, which is sometimes double or triple what they thought it would be.

Don’t try to second-guess your design team by holding your cards close to your chest. Help us work with you to get the most value for your hard-earned dollars. Most designers don’t look for opportunities to waste money just for the sake of it. Sure we all want a great project at the end of the process, but we also want to make sure our clients are happy. So establishing your budget early in the process will be helpful to your team, as it will give them one of the key ingredients that will go into making a design you can live with.

Ensure Your Budget Is Realistic

It’s easy to look at TV shows and get the wrong idea about what things cost. In most cases those budgets are not realistic for a bunch of reasons, most of which revolve around how suppliers and trades price their services to be included on the show. There is an old project management saying that goes, “Price, speed, quality — pick any two.” 

It’s not totally untrue, and it underscores that there are no easy trade-offs in a construction project. It would be problematic for me to suggest pricing in this article, as it varies substantially based on a number of factors, including location, number of trades in the area, level of finish, complexity of construction etc. 

The budget number that most clients care about is the “all-in” number. That includes everything they will write a check for including moving expenses, fees and construction. (More about that later.) 

Your design team can help you get a sense of what a realistic budget might be for your project; you can also ask friends who have done projects in the recent past, or check the Houzz Real Cost Finder

Pricing tip: Pricing can change substantially in certain areas over as little as a few years, so be sure that the projects were completed recently for the best idea of pricing.

After you create your budget, subtract 20 percent. Construction being what it is, there are always situations that arise that will increase the cost, and those are hard to foresee at the beginning of construction. It’s a very complicated process involving many people and a lot of communication, so there usually are things that happen that will eat into that 20 percent contingency. The contingency should not be used for upgrades to counters or splashy fixtures. 

On a recent project, our clients had to spend thousands of dollars to get their utilities hooked up again, as the electrical feed from the street was torn up by mistake. On top of that, since the utility’s own drawings said that the feed still existed, there was a three-month delay on top of the reconnection order so that the utility could update its drawings. Even though this these will never be seen, they were absolutely critical and had to be completed before construction could be completed. 

Keeping a 20 percent contingency allows our clients to end up spending what they thought they would spend initially, and they can sleep at night.

Understand What You’re Paying For

Hard costs, fees, furniture — what is in the contract? Your design team will also help you understand what is in those budget numbers. Hard costs include the costs of the construction materials and fixtures required to actually build the structure. Soft costs generally include fees for permits, consultants and designers.

It’s important to establish what your team is referring to in conversation to make sure everyone is on the same page about budget numbers. For example, construction is often expressed in dollars per square foot to give a rough guide during planning. Generally this does not include appliances or soft costs. So it’s important to know that if your contractor says your new house can be built for $750,000, there are soft costs likely not covered in that estimate. Work with your design team to understand the costs and how they relate to a schedule, and how there are items you might not have thought about, to get an overall sense of what is required.

What if You Run Out of Money?

We have had this conversation with clients on more than one occasion, and truly it’s not easy for either the clients or us. It’s frustrating to hear how something that you’ve been planning for is out of your reach. 

There may be opportunities to reduce costs by changing the scope of the project. For example, instead of fully constructing a basement bathroom in a new house, you might just rough in the plumbing so it could be finished at a later date. Or it could be possible to reduce the cost of fixtures and finishes such as flooring or faucets.

During a recent conversation with clients, we recommended that they wait before starting the project so they could gather more resources before proceeding. In the discussion we realized that it wouldn’t be possible to “de-scope” or redesign the project to fit their needs, so the best course of action was to delay. Was this difficult for all involved? Absolutely, but we felt strongly that starting a project that didn’t address their needs wouldn’t serve their overall best interests.

Whenever you are dealing with money, there is the potential for some uncomfortable conversations. But if you understand what you are dealing with early in the process, those conversations will be less stressful than if you’re standing in the middle of a half-completed project in the middle of winter wondering where all your hard-earned money has gone.