FREE DESIGNS AND ESTIMATES

Post-KonMari: How to Organize Your Pantry

By: Laura Gaskil

So you’ve tossed the old, unloved and expired food and spices. What’s next? After decluttering the pantry, it’s time to get organized. But with so many organizing products to choose from, it can be hard to know which are worth buying and which will end up gathering dust (or worse: making your pantry even more cluttered). 

To help you bring order to this hardworking part of your kitchen, we’ll divide your things into three categories: stuff you reach for every day, meal building blocks and staples, and occasionally called-for ingredients.

Pantry_Storage1.JPG

Stuff You Reach for Every Day

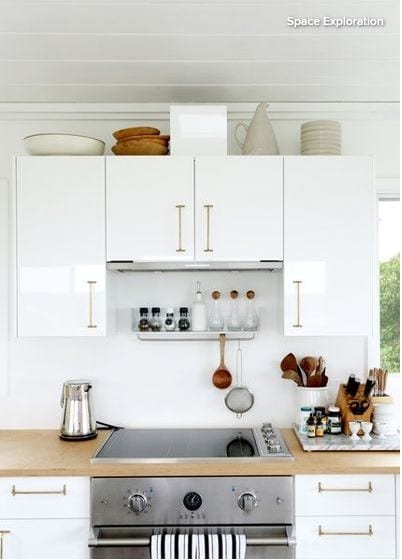
A tray or platter beside the stove. Your true everyday essentials (think olive oil, salt and pepper) should live within arm’s reach of where you use them. A tray, platter or slab gives these items a defined space to prevent straying, and is easy to move and wipe down. 

Check your own cupboards to see if there’s a platter or tray you can use for this purpose. You may not need to buy anything!

Pantry_Storage2.JPG

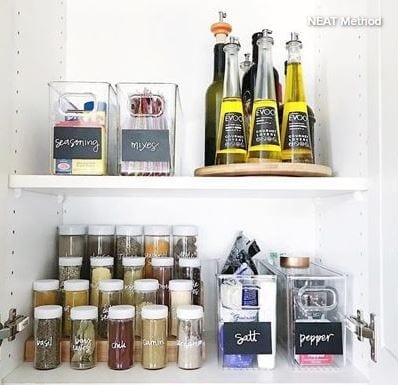
A dedicated shelf (or two) for essentials. Beyond salt and pepper, you can probably think of a handful of other ingredients you reach for nearly every day. These items would take up too much room on the counter, so aim for a shelf or cupboard near the stove, or above the counter where you like to chop vegetables. If your pantry is already near the cooking zone, dedicate an eye-level shelf to your essentials. 


Add one or more of these tools to make ingredients easy to spot at a glance:

  • Lazy Susan. A small turntable lets you circulate bottles of oil with ease.
  • Risers for spices. See what’s in the back row without having to rummage.
  • Clear bins. Corral little packets of this and that.
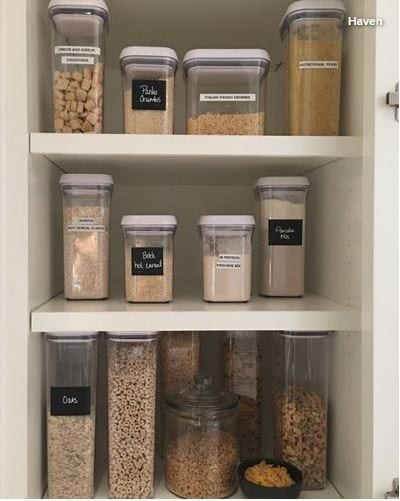

Meal Building Blocks and Staples

Clear, airtight containers for bulk goods. Buying grains, flours and other items from the bulk bins in the grocery store is economical and reduces packaging waste. Once you get home, transferring these items into a good set of canisters will help them stay fresh longer and keep critters out.

Tip: If you like to change up your ingredients frequently, use wipeable chalkboard labels. Then, when you fill the container with something new, you can simply wipe off the old info and write what’s in it now.
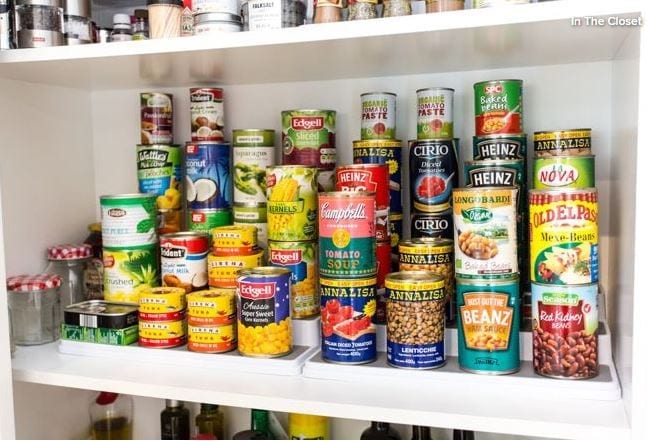

Pantry_Storage4.JPG

Risers for cans and jars. Slightly larger than spice risers, these stairstep-like organizers are especially helpful if you have deep pantry shelves and lots of canned goods (or jars filled with homemade goodies). 

DIY: To create your own risers, borrow a few wooden blocks from a child’s set (or get them from the hardware store) and stack in the back of a cupboard to give cans a lift. If the cans are sliding around, top the blocks with a layer of anti-slip tape (available at hardware stores or online).
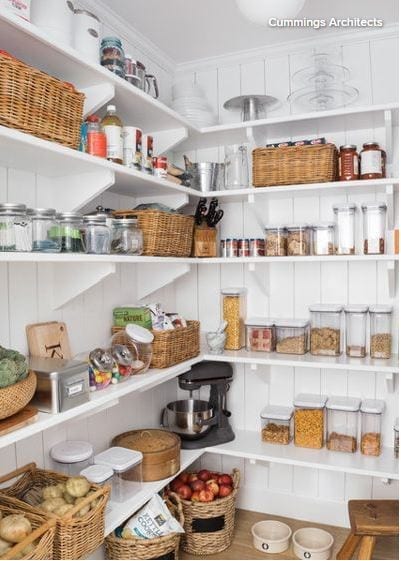

Pantry_Storage5.JPG

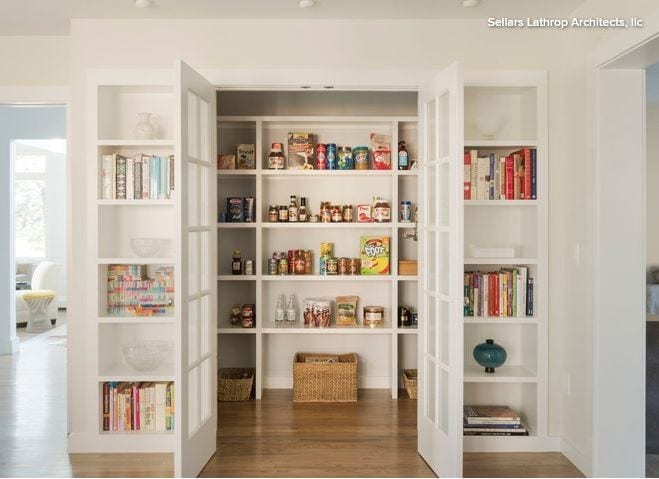
Baskets for potatoes and onions. If you have a walk-in pantry that stays cool and dark, this can be a great place to store potatoes, onions and other produce that doesn’t require refrigeration, such as apples and squash. Pick baskets that will allow air to flow around the produce, and store each type in its own basket. 

Tip: Keep apples in a different section of the pantry since they produce ethylene gas, which can speed spoiling of nearby veggies.
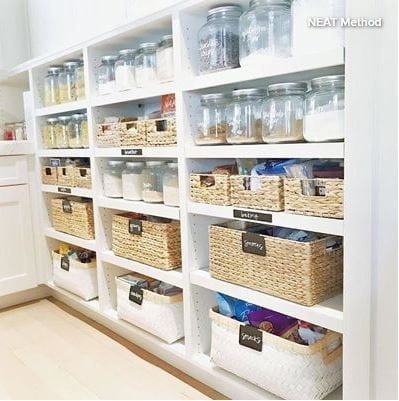

Pantry_Storage6.JPG

Occasionally Called-For Ingredients

“Project cooking” baskets or bins. Project cooking is the kind of cooking you may sometimes love to do, but it’s certainly not part of your everyday get-dinner-on-the-table cooking life. In other words, it’s a project. Think baking birthday cakes, decorating Christmas cookies, making homemade pasta or canning your own jam. 

Instead of mixing the special tools and ingredients required for these projects in with the rest of your pantry items, gather them in a project basket. The size of the basket or bin will depend on how much stuff you need to store, so gather the ingredients together before you go basket shopping!

Tip: Project cooking bins can certainly live on high shelves. Just be sure to label them clearly, and keep a stepladder nearby, if needed, to reach them.

Pantry_Storage7.JPG

Bulk supply bin or crate. If you like to stock up on certain supplies or ingredients, you’ll want to find a convenient yet out-of-the-way spot in which to keep them. The shelves from waist to shoulder height are best reserved for more frequently used items, so use the floor or a high shelf to store your extra goods. 

Bulky but light items (like paper towels) can go on a high shelf, while big and heavy stuff (like bags of dog food) should go on the floor. One or two large bins or crates can keep everything contained.
Be Prepared With A Household Inventory

You may have heard of, or even created, a home inventory before. This record, often used to document belongings for insurance purposes, can also be a really helpful tool if you are trying to declutter, prepare for emergencies, clear space for a remodel or just get organized. Check out these tips to create a thorough home inventory and streamline your belongings at the same time.

Make Your Inventory | Choose Your Checklist

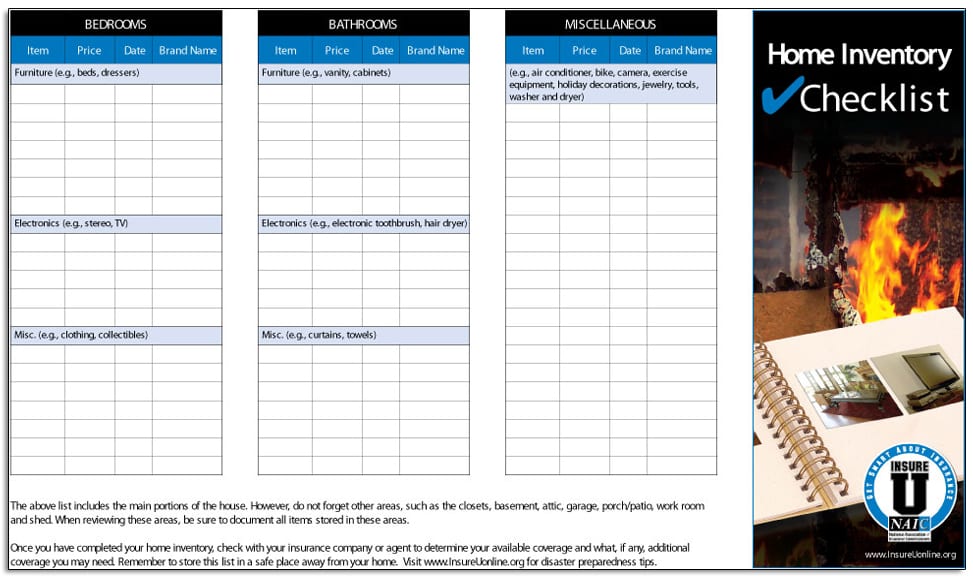
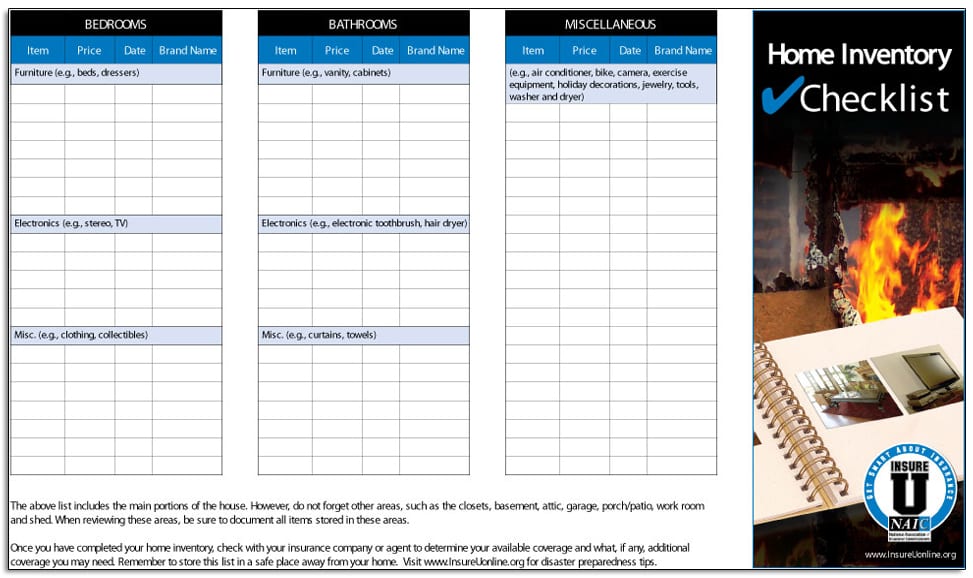
The first step in making a home inventory is getting your hands on a comprehensive checklist – one from your own insurance company is best. Review the checklist before getting started.


home_inventory_checklist.jpg

Photo: via Insurance U

Work Through Your Home, Room by Room 

Following your checklist, work your way slowly through the entire house – you may wan to divvy up the task over several weekends. Record a brief description of each item, how many you have, how much it cost and the year you purchased it. 

Don’t leave out any nooks or crannies. Craft rooms, sheds, attics, workshops, porches and garages should all be carefully examined and documented.

Supplement With Photos or Video

Using digital photos is one option, but you may find it easier to create a video tour of your home to document your belongings. Whether you are taking photos or video, start at the front and work your way through each room – try to go in the same order used on your checklist.


Simple_house_floor_plan.gif

Photo: via Wikipedia Commons

Add a Storage Map

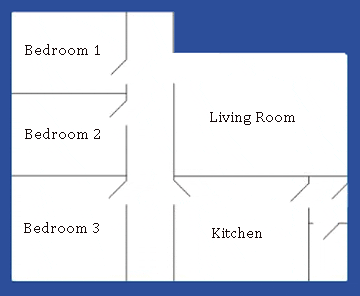
Noting down where exactly in the house everything is stored can be incredibly useful when you need to find something, whether it’s an emergency or just time to hang the Christmas lights. 

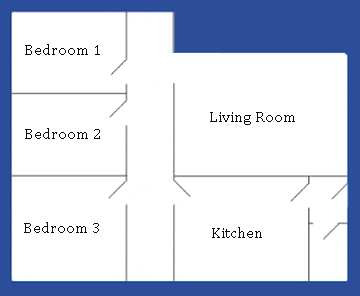
Use an actual floor plan if you have one; if not, you can create your own simple sketch of each floor of your house. Being as specific as possible, note where in each room boxes or other items are stored. 

Keep Paperwork in One Place

Gather receipts, credit card statements, appraisal documents and the like, and keep them bundled with your other home inventory materials.

Even better, take the time to scan everything and store the digital archive in at least two places.

Use Your Home Inventory to Declutter | Get Rid of Unnecessary Multiples

Cutting back on excess multiples can free up a lot of space in your home, but actually getting rid of unneeded things is easier said than done. Your home inventory checklist can make things easier by providing emotional distance.

Read over your list and mark any items you have a lot of. Do you really need all of those extra dishes? Start a list of things you want to sell or donate. 

Highlight Valuable Items

Especially note valuable pieces you’ve been holding onto for a long time but are not necessarily using. Do online research and estimate what you could sell the pieces for. Would you rather have the extra space and money? If so, let those pieces go!

Mark Your Calendar for a Big-Junk Toss

You know that stuff you’ve been meaning to toss but haven’t found the motivation to? We all have it. Now that your know exactly what and where yours is, set a date to (finally) take care of it.

Get prepared by researching where you can take it – things in good condition may be candidates for donation, while others may need to be dropped at a special recycling center. Involving a reward at the end of your day of errands is always a good plan!

Box Everything

Now that you’ve cleared out space in your storage areas, think about ways to make your storage really work for you. One simple but effective strategy is to tuck every single item in storage – whether in closets, cupboards or in deep storage – into a box or bin.

Containers instantly make things look neater, and it’s also easier to shift items around or grab a box you need rather than trying to unload armfuls of loose stuff from a shelf. 

Use Storage for Rotating Items Too

Free up space in cupboards, closets, shelves and counters for the items you actually use daily, and pack away the rest. This is one of the best ways to make your life easier, without getting rid of a drastic amount of stuff. Simply rotate in fresh dishes, linens and decorative items seasonally.

Consider Digital Backups

Creating digital backups (photos or scans) of important paper records, photos, kids’ art and other memorabilia can offer peace of mind. For less sentimental items, you may choose to actually toss the originals and keep only the digital record. 

Remember to Also…

  • Update your inventory anytime you buy something new or get rid of something on your list, pull out that inventory and note the change. If it’s something new you are adding , use this as a cue to look for a similar item on your inventory to get rid of. It’s much easier to keep clutter at bay than deal with it after things have gotten out of hand.

  • Keep a copy of your inventory offsite. Use a safe-deposit box or an online cloud-based storage system to keep your home inventory and all supporting documents secure.

var hzw_id=5193122;function hzwshow(id,v,delay){var showDiv=document.getElementById(‘hzexpand’+id);if(v){ position=function(element){ var p={x: element.offsetLeft || 0,y:element.offsetTop || 0};while(element=element.offsetParent){ p.x += element.offsetLeft;p.y += element.offsetTop;} return p;};var ref=document.getElementById(‘hzfooter’+id);var p=position(ref);var scrollX=(window.pageXOffset||(document.body.scrollLeft-10)||document.documentElement.scrollLeft);var x=Math.min(Math.max(p.x -(300-ref.offsetWidth)/2 ,scrollX),(window.innerWidth || document.body.clientWidth) + scrollX -300);var root=document.body;root.insertBefore(showDiv,root.firstChild);showDiv.style.top=(p.y + ref.offsetHeight + 3) + ‘px’;showDiv.style.left=x + ‘px’;} var timeout=window[‘hzwtimeout’+id];if(timeout) clearInterval(timeout);if(delay && !v){ window[‘hzwtimeout’+id]=setTimeout(‘hzwshow(‘+id+’,false,false)’,400);} else{ showDiv.style.display=v?’block’:’none’;} }

(You are reading an article originally posted on

Houzz

)

Be Prepared With A Household Inventory – and Use It To Declutter Too

You may have heard of, or even created, a home inventory before. This record, often used to document belongings for insurance purposes, can also be a really helpful tool if you are trying to declutter, prepare for emergencies, clear space for a remodel or just get organized. Check out these tips to create a thorough home inventory and streamline your belongings at the same time.

Make Your Inventory | Choose Your Checklist

The first step in making a home inventory is getting your hands on a comprehensive checklist – one from your own insurance company is best. Review the checklist before getting started.

Photo: via Insurance U

Work Through Your Home, Room by Room 

Following your checklist, work your way slowly through the entire house – you may wan to divvy up the task over several weekends. Record a brief description of each item, how many you have, how much it cost and the year you purchased it. 

Don’t leave out any nooks or crannies. Craft rooms, sheds, attics, workshops, porches and garages should all be carefully examined and documented.

Supplement With Photos or Video

Using digital photos is one option, but you may find it easier to create a video tour of your home to document your belongings. Whether you are taking photos or video, start at the front and work your way through each room – try to go in the same order used on your checklist.

Photo: via Wikipedia Commons

Add a Storage Map

Noting down where exactly in the house everything is stored can be incredibly useful when you need to find something, whether it’s an emergency or just time to hang the Christmas lights. 

Use an actual floor plan if you have one; if not, you can create your own simple sketch of each floor of your house. Being as specific as possible, note where in each room boxes or other items are stored. 

Keep Paperwork in One Place

Gather receipts, credit card statements, appraisal documents and the like, and keep them bundled with your other home inventory materials.

Even better, take the time to scan everything and store the digital archive in at least two places.

Use Your Home Inventory to Declutter | Get Rid of Unnecessary Multiples

Cutting back on excess multiples can free up a lot of space in your home, but actually getting rid of unneeded things is easier said than done. Your home inventory checklist can make things easier by providing emotional distance.

Read over your list and mark any items you have a lot of. Do you really need all of those extra dishes? Start a list of things you want to sell or donate. 

Highlight Valuable Items

Especially note valuable pieces you’ve been holding onto for a long time but are not necessarily using. Do online research and estimate what you could sell the pieces for. Would you rather have the extra space and money? If so, let those pieces go!

Mark Your Calendar for a Big-Junk Toss

You know that stuff you’ve been meaning to toss but haven’t found the motivation to? We all have it. Now that your know exactly what and where yours is, set a date to (finally) take care of it.

Get prepared by researching where you can take it – things in good condition may be candidates for donation, while others may need to be dropped at a special recycling center. Involving a reward at the end of your day of errands is always a good plan!

Box Everything

Now that you’ve cleared out space in your storage areas, think about ways to make your storage really work for you. One simple but effective strategy is to tuck every single item in storage – whether in closets, cupboards or in deep storage – into a box or bin.

Containers instantly make things look neater, and it’s also easier to shift items around or grab a box you need rather than trying to unload armfuls of loose stuff from a shelf. 

Use Storage for Rotating Items Too

Free up space in cupboards, closets, shelves and counters for the items you actually use daily, and pack away the rest. This is one of the best ways to make your life easier, without getting rid of a drastic amount of stuff. Simply rotate in fresh dishes, linens and decorative items seasonally.

Consider Digital Backups

Creating digital backups (photos or scans) of important paper records, photos, kids’ art and other memorabilia can offer peace of mind. For less sentimental items, you may choose to actually toss the originals and keep only the digital record. 

Remember to Also…
  • Update your inventory anytime you buy something new or get rid of something on your list, pull out that inventory and note the change. If it’s something new you are adding , use this as a cue to look for a similar item on your inventory to get rid of. It’s much easier to keep clutter at bay than deal with it after things have gotten out of hand.
  • Keep a copy of your inventory offsite. Use a safe-deposit box or an online cloud-based storage system to keep your home inventory and all supporting documents secure. 


(You are reading an article originally posted on Houzz)

Kitchen Space and the Organized Homeowner

The war against clutter is not just about keeping objects in your space in line. It’s about the emotional pay-off of having a space that is easy to move around in. And no room in your home demonstrates this benefit more than your kitchen.

To explore this, guest writer Jenney Maria is here to present a few ideas on de-cluttering and organizing your kitchen.

Photo: American Cabinet & Flooring | Designer Clay Bernard

The kitchen is the central part of every house, as the whole family gathers here to prepare food, enjoy the meal and to entertain friends. It is also the most frequently used portion of your house which needs to be organized on a daily basis. If you utilize your kitchen space effectively, food preparation and cleaning up becomes very efficient and comfortable. Here are some tips that will help you a lot in organizing your kitchen in an efficient manner.

Kitchen space, the wheat and the chaff

First of all, it is very important to make a list of all the items that you will need in the kitchen. You should only include items that you use on a daily basis and try to avoid any unnecessary items. After preparing the list assess the situation, which is, what you actually have and which items you’ll have to purchase. 

Zones and your kitchen

Once you have all the things you need; now you can start organizing your kitchen. Divide your kitchen into different zones, e.g. cooking – eating – and washing. Your kitchen can be organized very easily if you arrange things accordingly. Designate a small area for your family members to sit and eat in the kitchen. A well-organized kitchen will give you a pleasant feeling every time you enter and will make your kitchen tasks quite easy and hassle-free.

The right kitchen tools to have

The next step is to place all the routine tools and appliance near you. You must have an easy access to all these items because while working in the kitchen, you have to perform multiple tasks. You should place your cooking utensils in a storing container so that you can save the drawer space. Make use of the cabinet doors by placing cook books, or other type of reading materials that you require while cooking, inside. 

Kitchen space organization

Finally, it’s time to position things. Ensure that you have placed the things that work together near each other. For example pots, pans, whisks, spatulas and also ladles should be placed near the stove; bowls, measuring glasses and appliances should also be in the cooking zone. Small appliances, sharp tools and cleaning chemicals should be carefully placed in secured storage areas so that children are not able to reach them. Hardly used tools and appliances should be placed on the top shelf.

Simplify your life in your kitchen

By following these simple tips you can easily utilize your kitchen space and make your life much easier. Dividing the kitchen area according to your work will help you find whatever you require as it’s needed and will save your time and energy. Having a well-organized kitchen could make your task movement smooth, and your time in the kitchen will be more enjoyable and comforting.

Ready Your Home for Fall to Savor the Season More

Fall is a glorious season. With blazing leave and roaring fires, apple picking, harvest festivals and sweater weather, there is so much to look forward to. And with that studious, back-to-business mood permeating the air, we feel invigorated to take on new projects and work a bit harder. Kick off this busy season by taking the time now to prepare your home, incorporating both important tasks (like cleaning the chimney) and pure pleasures (like treating yourself to a luxury bath product).


fall_home-gutter.jpg

Photo: Handyman Matters

These 14 tasks will help you seamlessly transition your home from summer to fall.

#1 Inspect the roof, gutters and drainpipes

Depending on your climate, you may want to hold off until later in the fall (when most leaves have dropped) before cleaning the gutters, but doing a visual inspection now is a good idea. If any branches and leaves fell during summer storms, remove them so they don’t cause blockages during autumn rains. Inspecting your roof now will leave ample time to have repairs or a replacement made before the winter.

#2 Edit your crafting stash

If you knit, sew or practice any other craft that comes with lots of supplies, it’s time to begin sorting and purging that mountainous stash. Fall and winter will beckon with cold afternoons that are perfect for engaging in making something with your own two hands – be ready!

#3 Move firewood to a covered area

Be sure to check for insects before bringing any wood indoors. Don’t store wood with bugs, especially termites, indoors (or against the outside of your house).

#4 Have chimneys cleaned before you light the first autumn fire

Residue buildup and blockages in chimneys are a common cause of house fires, so be sure to have a pro take a look before sparking that first flame.

#5 Organize the entry

Fall brings with it loads of jackets, mucky boots and bundles of paper. Think ahead and give every type of item a home. That means baskets and bins for accessories, hooks for jackets and bags, and shelves or metal trays for shoes and boots. Add a pin board or a magnet board with a calendar, a place to drop keys and mail, and a bin for recycling, and you should have all your bases covered.

#6 Clear your desk

If you do any work from home (or have a student in the house), now is the ideal time to tackle those piles of paper and start this busy season with a clean and clear workspace. Have drawers, cabinets or shelving within arm’s reach so you can easily put things away and not clutter up that desk again.

#7 Sort the pantry

Set the stage for healthy dinners by creating a neat and orderly pantry with healthful choices front and center. Toss expired foods and consolidate packages that have just a little left. If you like, pick up a flat of canning jars and a packet of labels to create your own organizing system for bulk-bin goods.

#8 Deep clean the tub and treat yourself to something new

We may not be heading to the beach as often these days, but the time is just right for a relaxing soak. Give your tub a thorough cleaning and pick up something that will make your soak extra special, whether that is an essential oil you love, a beautiful brush or a luxuriously soft towel.

#9 Tidy the porch

After a season’s worth of sandy feet tramping back and forth, your porch deserves a good cleaning. Sweep away sand, clean the front window and door, check porch lights and add a few extras like hurricane lanterns or autumnal potted plants.

#10 Stock up on cold and flu remedies

Make a list of everything from your favorite preventative measures to the medicines and other items your family relies on while sick, and pick up these items now. You will fee good knowing you have everything you need if and when someone in the house feels under the weather.

#11 Check lighting throughout your home

As the autumn sun dips lower in the sky, you may find you crave a little extra light in your rooms. A few small table lamps or even a strand of twinkle lights can make all the difference in creating a cozy ambience.

#12 Refresh cleaning supplies

Take a few minutes to pull everything out from beneath the kitchen sink (yes, wads of plastic bags and all), sort it and put back only what you need. If this is where you reach when you need supplies for daily cleaning tasks, move everything not related to these tasks elsewhere.

#13 Swap out bedding

Bring cozy quilts and duvets out of storage so they will be within reach on that first chilly night. Check now if anything needs to be laundered and you’ll have time to wash it before you really need it.

#14 Savor you hard work

Sit back and enjoy a well-deserved rest. Brew a pot of tea, pour yourself a glass of wine, crack open a new novel or do whatever puts the icing on your cake.