FREE DESIGNS AND ESTIMATES

How to Find Your Kitchen Style

If you’re planning to remodel your kitchen, here’s how to find inspiration and start narrowing down your choices.

By Rebekah Zaveloff

When most homeowners embark on a kitchen remodel, they spend endless hours collecting inspiring kitchen photos. But this doesn’t necessarily help people figure out what they want, and it can even cause confusion. The tough part of the process is learning to narrow down the options and home in on what you want your dream kitchen to look like.

Gather Inspiration

Collect images. You may not be able to see it at first, but a pattern will show itself. You may find that a whole bunch of your kitchen inspiration images may need to be added to an ideabook for a future farmhouse or weekend getaway, but don’t skip over them just because they don’t relate to this project, save them for later.

Don’t edit yourself (yet). Don’t make yourself nuts from the get-go by trying to edit as you collect. I really believe in collecting with reckless abandon first and editing later. Editing yourself while you gather inspiration can be challenging and stifling for creativity.

Organize (but only if you want to). It’s OK to be unorganized and even a little messy with your photo categorization. If you’d like to organize your photos in your ideabook, then you’re a step ahead of us, but for those who don’t, don’t sweat it. There’s time to go back to your photos and label them later.

Start looking for a pro. This can be a great time to start noting the professionals who are responsible for the designs you like and looking for a design professional you might like to interview. For some homeowners, the right thing to do is hire a professional out of the gate and have him or her help you through this inspiration-gathering phase. Some homeowners even hand this off completely to a designer, and it’s the designer’s job to listen, interpret, and collect inspiration for the client and bring it back for approval.

Categorize Photos

Once you have a fair number of inspiration images to work with, go back through them and put them into loose categories.

You can categorize by style: Maybe you seem to fall on the fence between vintage and modern. Or maybe you find that you have a bunch of images of kitchens with dark wood floors. You can create a collection dedicated completely to islands or kitchen banquette seating. Consider creating an idea book for lighting, one for wallpaper, and any other details you’d like to single out. For now don’t think about why you like things, just that you do or don’t.

Edit Your Selections

Go back through your ideabooks and see if you still respond emotionally to the images within. If it’s been a while since you started gathering inspiration and you’ve looks at hundreds of spaces, your taste might have changed without you even realizing it. Ruthless editing can help clarify things. You’ll look at a room and say “Why on earth did I save that photo?” If you can’t remember and it doesn’t speak to you any longer, ditch it. See how easy that was?

Collect Images With Intention

Now that you’ve collected at random, categorized and edited, go back through all your saved photos and review images for specific items. Look only for glass-front cabinets, industrial hoods or island lighting, for example, not at the image as a whole. You might not like all features of a room, but one element could be exactly what you want.

When working with a client — often more than once during a project — I pull inspiration images and say, “Don’t look at the wall color or the cabinet style. Just look at the hood.” Or “look at the way the crown molding transitions around the beam and hood” or something very specific like that. Make a note beneath a photo with an element you like and edit your photos again.

5 Trade-Offs to Consider When Remodeling Your Kitchen

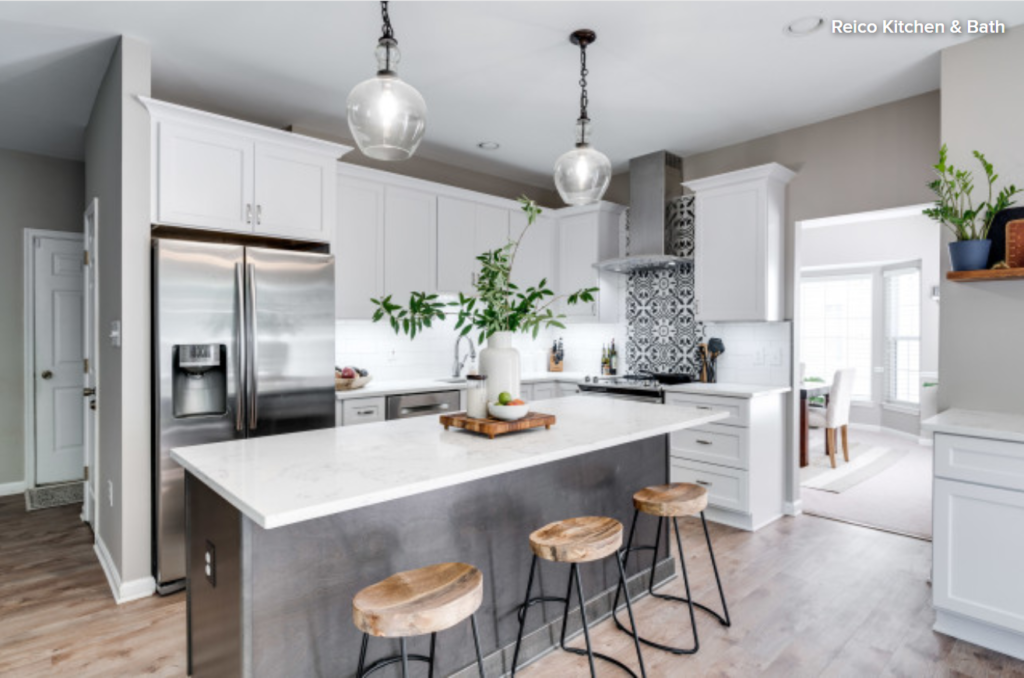
It would be great to have an unlimited budget for a kitchen renovation. But the fact is most of us do not. And that’s OK. Compromises of one form or another are part of the process, even for the rare homeowner who enjoys a bottomless budget and expansive square footage. 

But how, exactly, do you decide between two compelling options with different pros and cons? The most critical tool to have on hand to help you make tough choices is a clear picture of your remodel goals. To get clarity on what matters most to you, read about some key trade-offs you and your kitchen designer will consider during your project.


Kitchen_Cabinet_Tradeoffs_1.jpg

How Will You Use Your Kitchen? 

When planning a kitchen remodel, you want to be very clear on how you want to use your new kitchen. Here is one example: I want to have people over more often. I want to feel relaxed when I entertain. In order to feel relaxed, I need to make sure that no one is in my way while I cook. I also want my kitchen to stay neat during the cooking process and be laid out so that cleaning up will be efficient.

Clear goals can help homeowners make decisions and, as the budget nears its limit, ultimately choose the options that will best support their goals. What matters most to you in a kitchen?


Kitchen_Cabinet_Tradeoffs_2.jpg

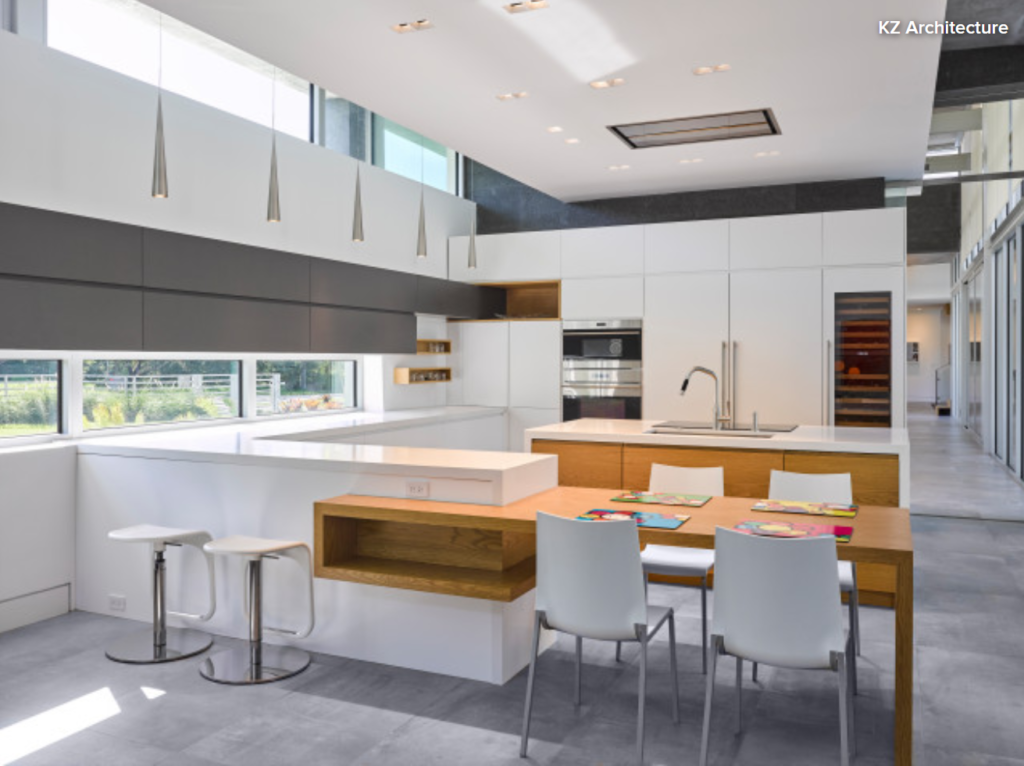
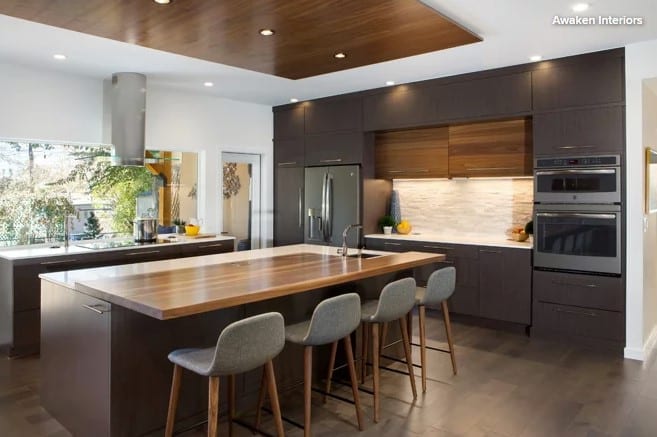
1. Daily Use vs. Special Events
This area of consideration has to do with how many people your kitchen will serve. From refrigerator storage to seats at the dining table, the number of people you want to accommodate will affect your design choices. You’ll want to consider not only how many people live in the home now, but — if this is your forever home — how many will live in it 10 years from now. Also, how often do you entertain and for how many people? 

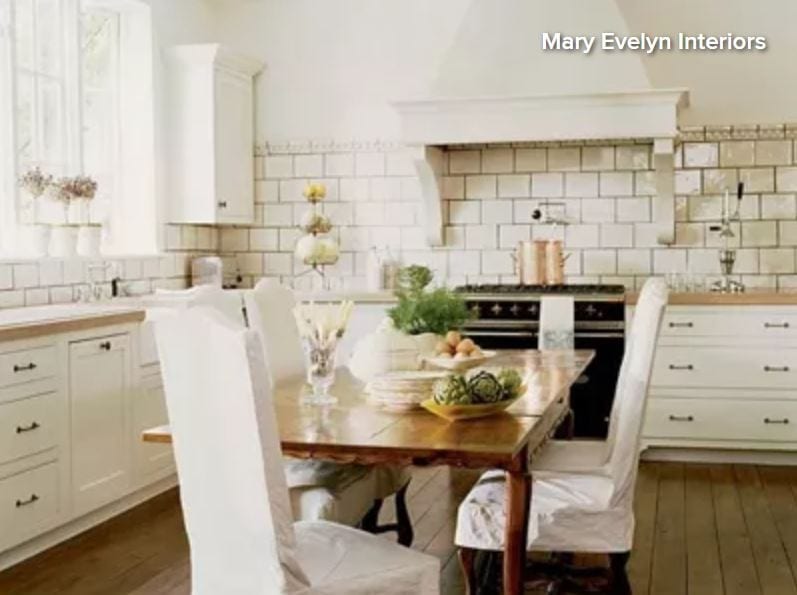
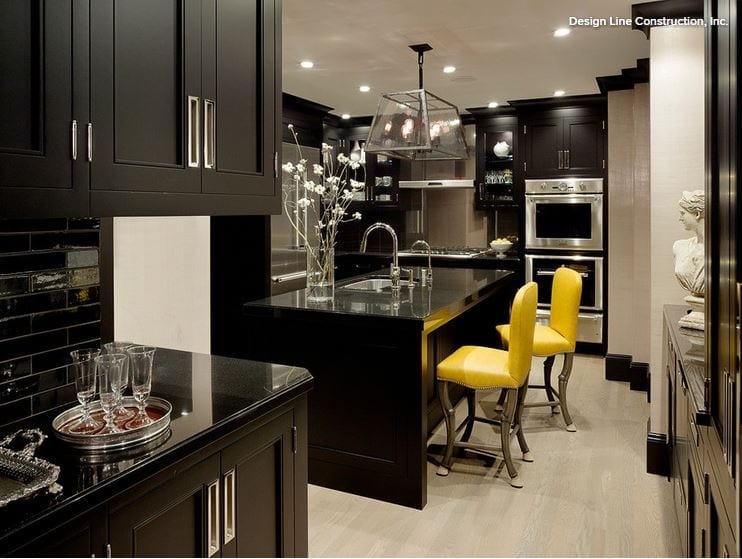
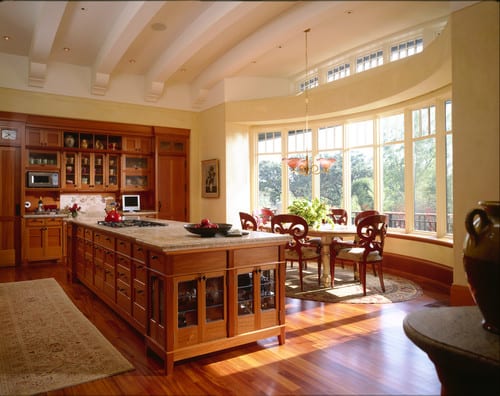
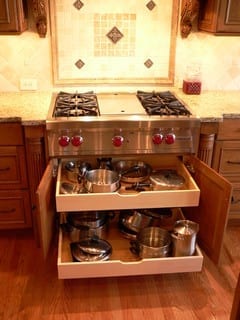
I had a client who was retired and cooked only for herself and her husband most days. She entertained just four times a year, on holidays. At first, I was a bit baffled by her choice of a 36-inch range, double ovens and a 48-inch-wide refrigerator. But for her, these choices made sense. 

As the matriarch of a large family, on those four holidays she cooked for 25 to 30 people and had at least two or three people helping her in the kitchen. It was important to her that we designed a flexible space that worked just as well when cooking for two as for 30. 

That approach is a good one: Whenever possible, I recommend that clients design with their maximum capacity needs in mind.


Kitchen_Cabinet_Tradeoffs_3.jpg

2. Cost vs. Value
As you may have discovered if you’re considering a remodel (or in the midst of one), everything from cabinets to sinks to appliances comes at a variety of price points. How do you decide when it’s worth it to splurge for a high-quality item and when it’s best to save your dollars? Here are some questions to ask yourself:

  • Will the investment improve your everyday life?

  • Will the product solve a pet peeve?

  • Will the addition of this element make your house feel like a home?

  • Will the purchase increase the value of your home?

In each of these cases, you may decide that the cost of a feature for your new kitchen is worth it because of the value it brings. For example, a better dishwasher might eliminate the need to prerinse dishes. 

Perhaps you hate scrubbing dishes, can afford an upgrade and would cherish any minute of spare time away from the sink. Or perhaps you feel quite the opposite: You don’t mind scrubbing dishes at all, and this investment wouldn’t be worth the pennies spent. 

Framing your choices as cost vs. value — in terms of your experience in your kitchen, and possibly the resale value of your home — can help you get clarity on what’s worth the extra money.


Kitchen_Cabinet_Tradeoffs_4.jpg

One helpful way to prioritize your desires is to analyze the frequency and duration of a given task. Tasks you do frequently or spend more time on should get more weight as you consider what is worth investing in. 

For example, most people use the burners to cook 80 percent of the time, the oven 20 percent of the time. If this applies to you, I recommend prioritizing the cooktop as opposed to the wall oven, both in terms of placement in your kitchen and quality of product. You wouldn’t want to give up a great burner feature to get a fancier oven. 

On the other hand, if you are a frequent baker but rarely use the stovetop, you may prefer to invest in wall ovens rather than spend your budget on a fancy range. For you, it would be better to make sure that reaching into the oven is more ergonomic — done while standing upright, rather than bending over.


Kitchen_Cabinet_Tradeoffs_5.jpg

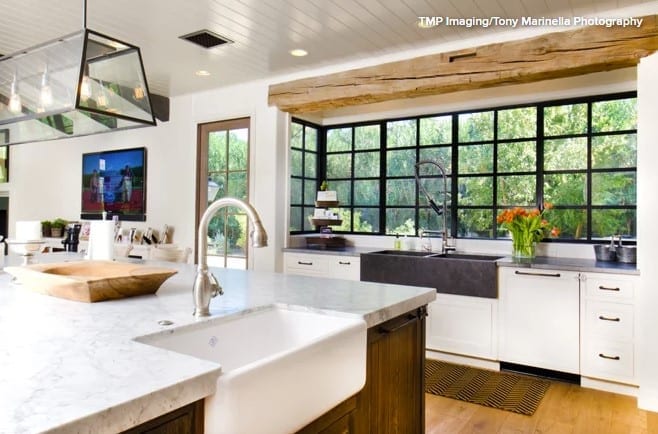
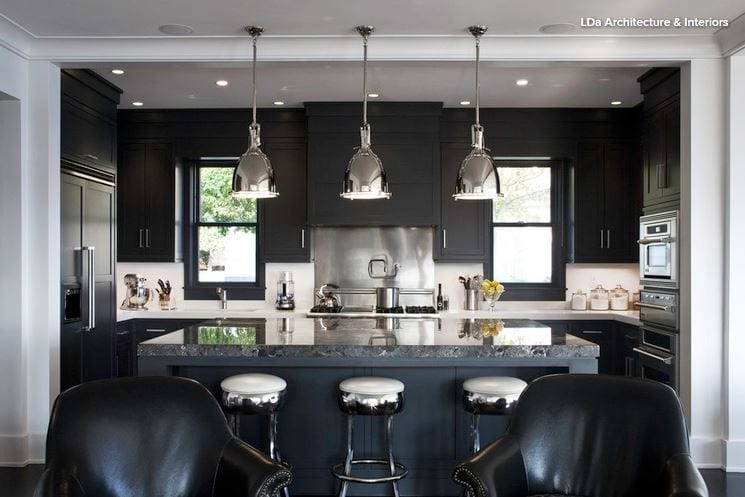
3. Function vs. Aesthetics
Ideally a kitchen redesign brings both beauty and function, but when we are dealing with limited funds, trade-offs between functionality and aesthetics may be necessary. By function, I mean not only the kinds of bells and whistles you get with high-end appliances, but also the kitchen’s layout and the choice of whether to have one sink or two. 

Aesthetics, of course, are the expensive but gorgeous finishes and customized detailing that bring a high-end look to a kitchen. Quite often, a budget may force you to make choices on what matters most to you — the functionality or the look. 

This area of trade-off is deeply personal and has a lot to do with your lifestyle. When weighing aesthetics vs. function, you’ll want to consider everything I mentioned before: how many people you cook for daily, how often you entertain, the kind of entertaining you do (backyard barbecues vs. sit-down dinners), the style of cooking you prefer and how many people work in the kitchen at one time. 

For example, a client who doesn’t do a lot of cooking and is more concerned with the kitchen’s look than its function might really want a beautiful built-in fridge with custom panels but be willing to use a less expensive range or counter material to have that pricey, beautiful fridge. 

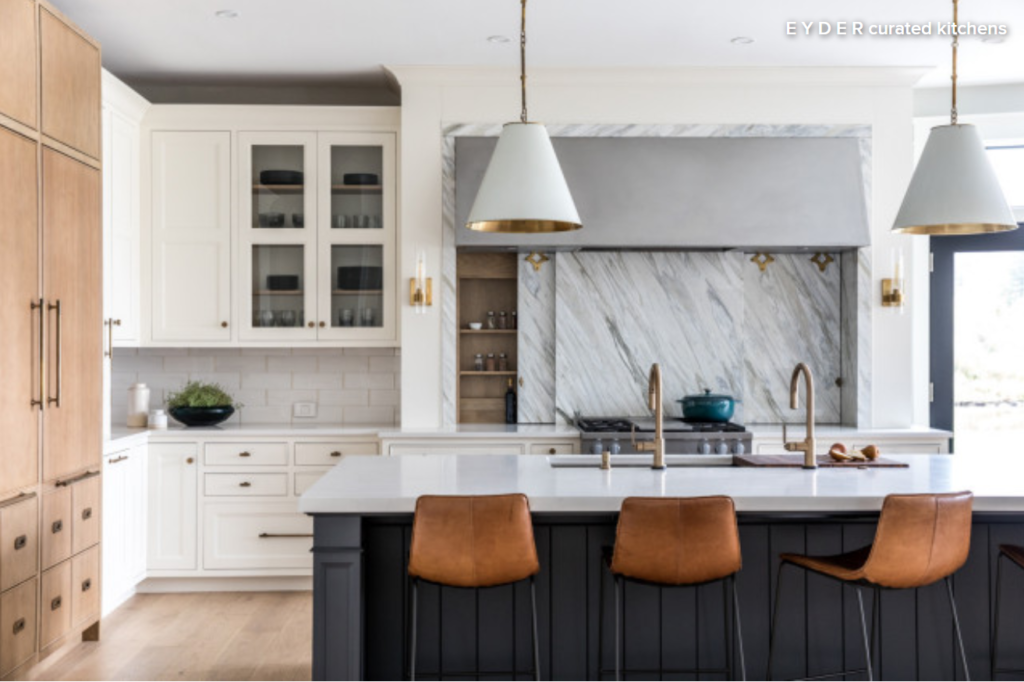
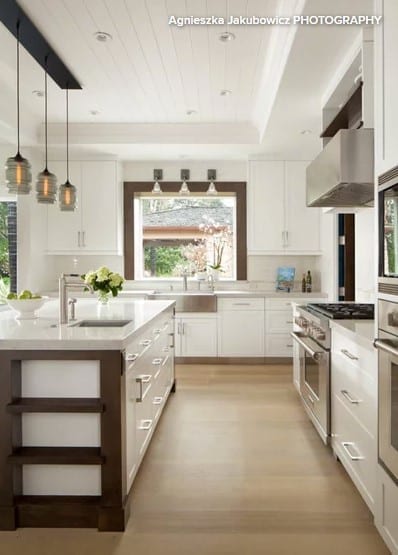
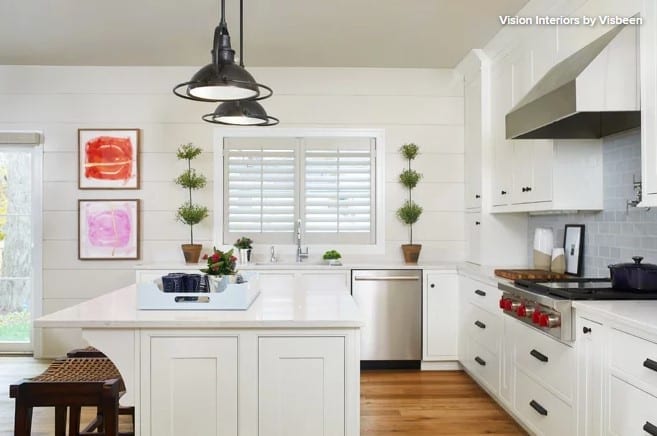
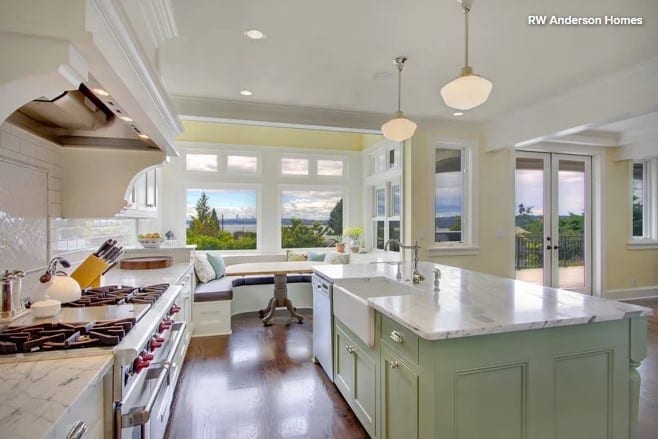
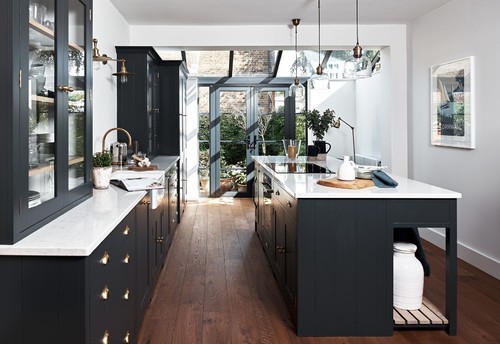
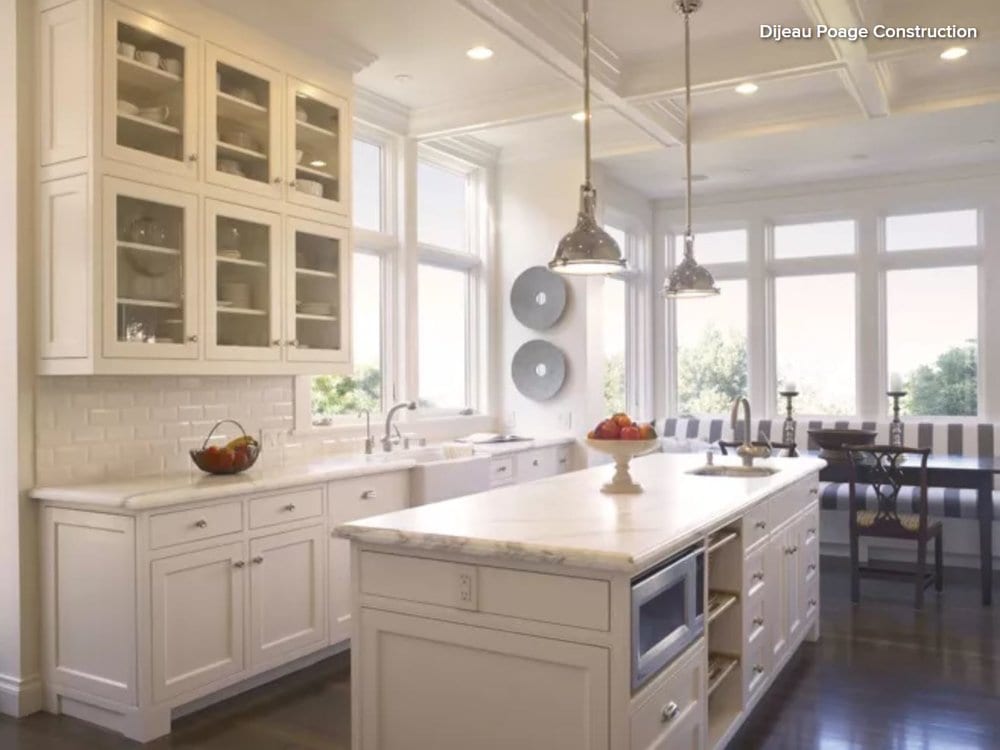
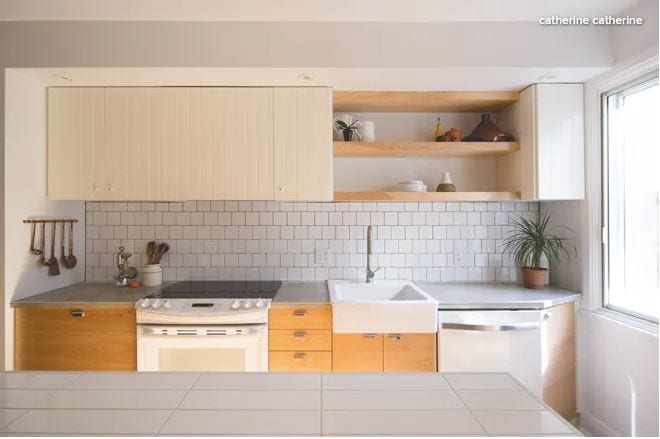
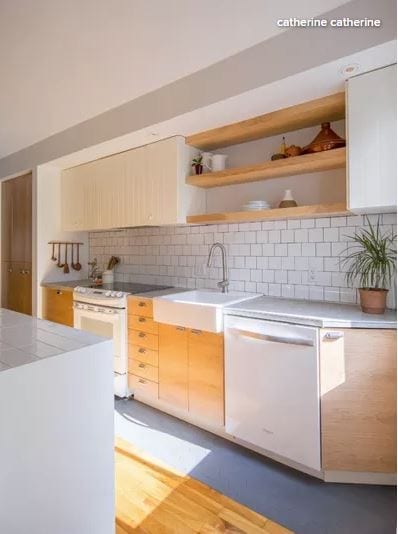
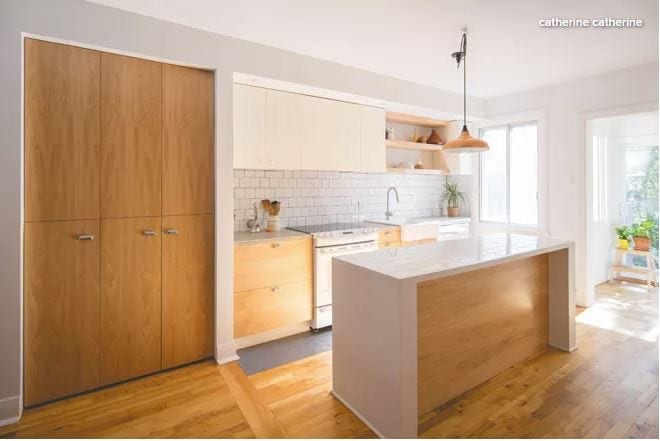
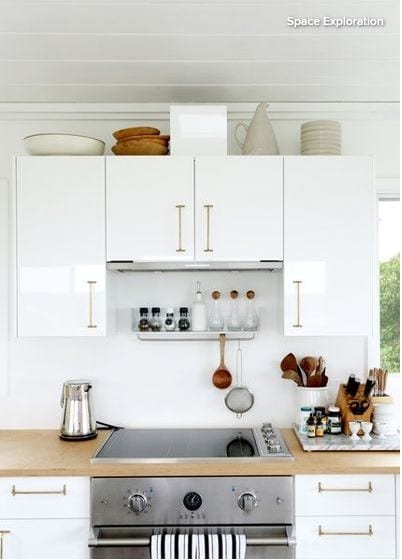
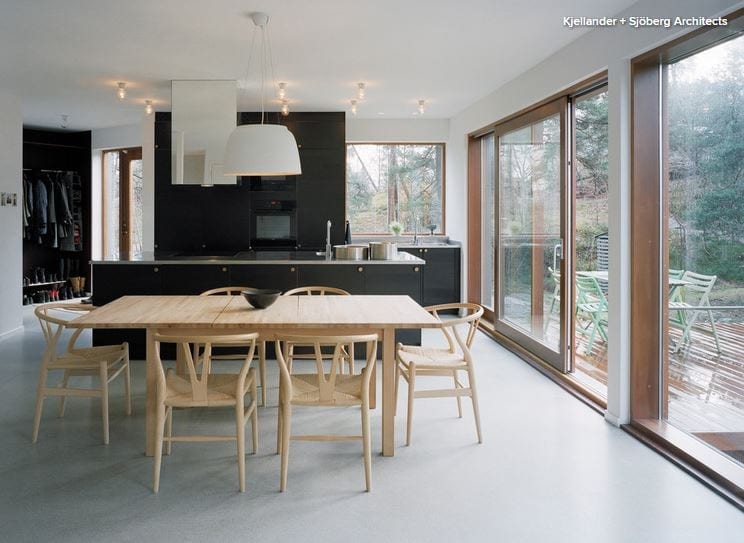
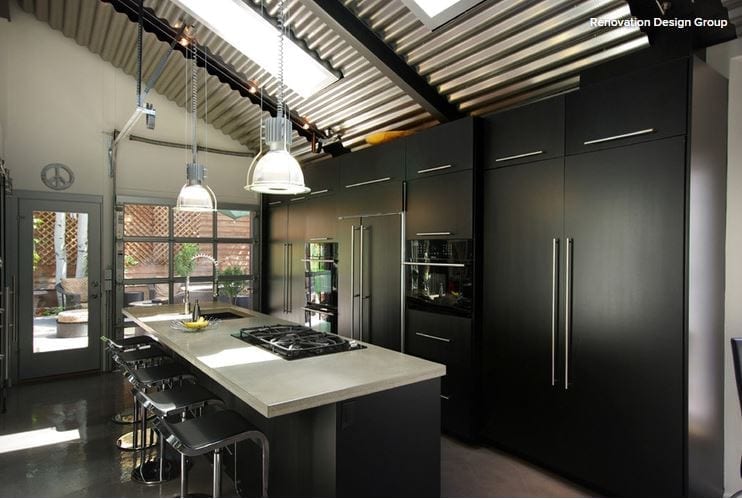
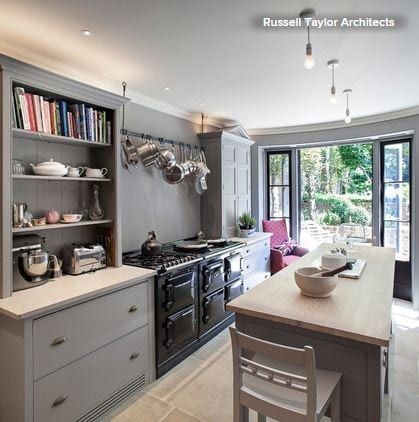
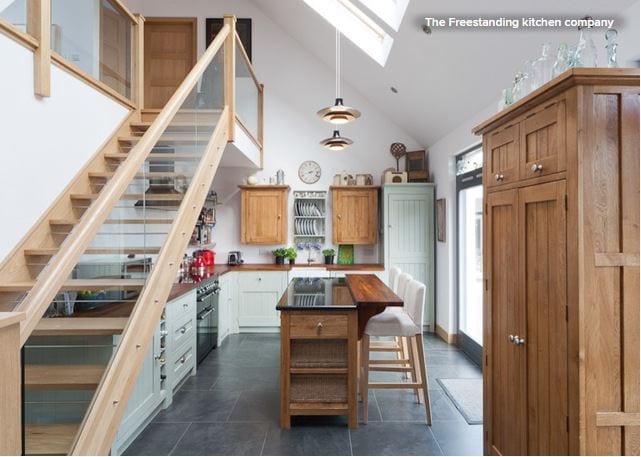
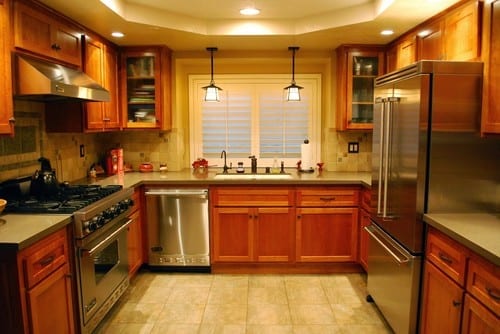
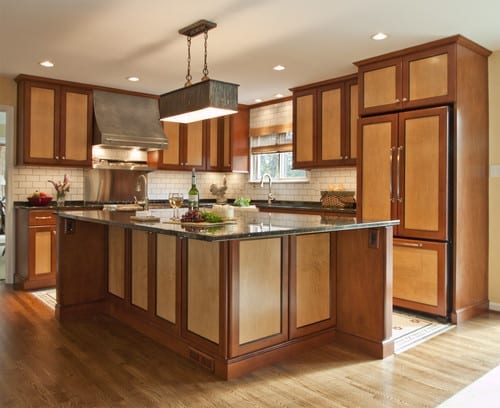
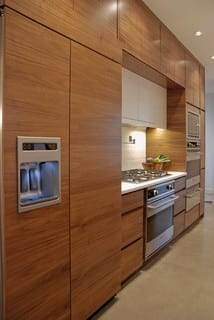
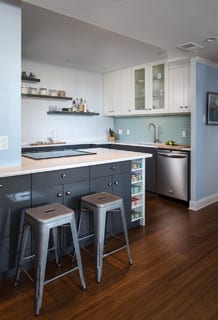
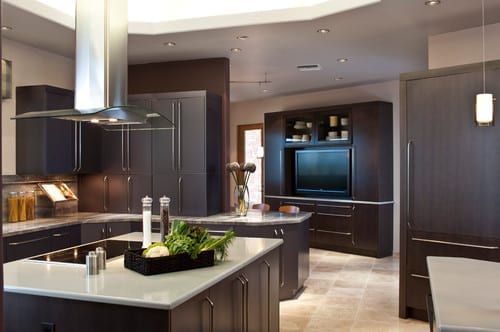
On the other hand, I have had several clients (including the owners of the kitchen in this photo) who chose a free-standing fridge and put their budget into the plumbing and construction work required to add a second sink. To me, this is a significant functional improvement and, for those who enjoy cooking and entertaining, worth scaling back on some of the aesthetic details. 

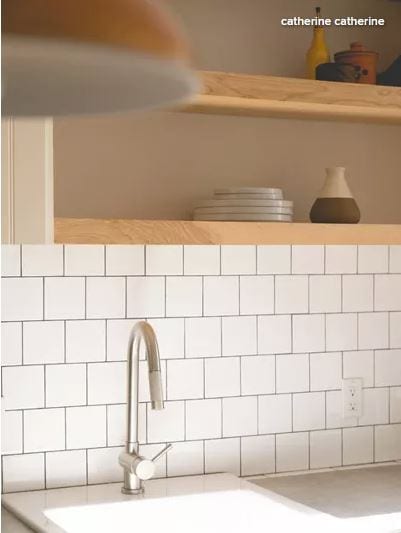
There are many ways you can cut back on aesthetics to create room in your budget for what’s important to you functionally. You might consider a simpler, less expensive door style on the cabinets, or a ceramic backsplash tile instead of glass, or quartz counters instead of granite.

I even had one client use a very inexpensive laminate counter so that she could put more money into the remodel work necessary to get the layout just right. Since she was in her forever home, she replaced the laminate with a beautiful stone two years later when finances allowed.


Kitchen_Cabinet_Tradeoffs_6.jpg

4. Speed vs. Patience
Any home improvement project takes time — that’s just part of the process. And once the kitchen is demolished and construction is underway, any delay can be difficult, particularly if you are living in the home and dealing with the mess. When you are in that situation, the risk is that you will be tempted to say yes to anything just to get the project done and your home back to normal. 

This happened with one of my clients, who decided to use a second-choice backsplash because it was in stock, whereas her first choice had a month lead time. On the other hand, a different client had trouble finding a backsplash tile she liked, so she finished her kitchen and skipped the backsplash altogether. Three months later, she found the perfect tile and brought the tile installer back. I am sure you can guess which homeowner was more happy with her kitchen remodel.

When making a large financial investment that you are going to live with a long time, I recommend that you go slowly, taking the time to find the right people to help and weighing your decisions carefully. 

That being said, speed can be a necessary evil. Perhaps you are remodeling for a special event, such as a backyard wedding. Or maybe you are planning to sell the house and just want a quick face-lift to get the most out of your investment. 

As a guide when weighing the need for speed vs. the need to exercise your patience muscles, I recommend you consider how long you plan to live in your home. If you’re going to sell within five years, keep in mind that everything doesn’t have to be perfect — you simply want to be sure you will get your investment back when you sell. However, if you plan to live in the home for 10 years or more, it’s worth slowing down and investing in your quality of life. Take the time to find the right solution, not the quick one.


Kitchen_Cabinet_Tradeoffs_7.jpg

5. The Ideal Me vs. the Real Me
This one isn’t so much a trade-off as a reality check. It’s worth mentioning that some clients have fantasies that a remodel can change their habits — or even their personalities. But my observation has been that if you are already a messy cook, the chances of a new kitchen transforming you into a clean-as-you-go type are pretty slim. 

Rather than plan a kitchen for the person you wish you were, focus on solutions that take your true habits into account. For example, a messy cook who is embarrassed when guests are around might want to add a separate cleanup sink where he can hide dirty dishes while making a meal. 

Or, if clutter is a constant problem, a homeowner might want to create a hidden drop zone for papers, cellphones, pens and other detritus that kitchen counters tend to attract.  

7 Reasons to Choose Dark Kitchen Cabinets

Article by Amanda Pollard

Dark and dramatic or light and bright? When it comes to choosing kitchen cabinets, it can be hard to decide. Here we look at the benefits of crossing over to the dark side.

1. Add Ambiance

If you’re looking to design a kitchen that’s both contemporary and cozy, dark cabinets could be the way to go. Inky surfaces, like the ones in this elegant kitchen, help enclose the space slightly to create an intimate feel.

Position your lighting strategically, so it casts an atmospheric glow over the dark finishes.

2. Bump Up the Style 

For a dose of sophistication, you can’t beat dark cabinetry. Moody colors give a grown-up feel that can make a space feel seriously chic. 

In this kitchen, the classic white wall tiles and the pale gray flooring highlight the dark gray cabinets and the black architectural features beautifully. Brass handles, meanwhile, bring out the richness of the charcoal hue.

3. Hide the Knocks

All kitchens get their fair share of wear and tear, but some show it less than others. A kitchen with dark cabinets, such as this one by Compass & Rose, is a good choice if you think your cabinets are going to need to stand up to frequent spillages and dings. 

A dark surface can be more forgiving than a light one and won’t instantly show scuffs and stains. If you’re painting your cabinets, make sure you apply a few coats, so the dark undercoats hide any scratches in the topcoat.

4. Contrast With White

If you’re going for a white countertop, contrasting it with a dark shade will have the most striking effect. The gleaming marbled surface here looks stunning against the deep-hued cabinets. The House of Beulah designers embraced the contrast, mixing white walls with dark gray features. To warm up the room, they added a wooden floor and some soft foliage.

5. Highlight Bold Colors

Just as dark cabinets set off a white countertop, they also can form a dramatic backdrop for other vivid colors. Take a look at this kitchen designed by Roundhouse, for example. The dark gray cabinets are neat and practical, but it’s the accents of green and red that really make the space. The cabinetry works as a moody canvas to showcase those bright bursts of color.

6. Embrace Luxury

Dark colors look beautiful with metallic finishes, such as brass and copper, as this space by Naked Kitchens illustrates. The green cabinets complement, rather than clash with, the brass faucet and backsplash.

The two surfaces are wonderfully balanced, giving this room a feeling of understated luxury.

7. Zone the Space

In an open plan, it’s a good idea to use color to zone different areas. By using a dark shade on your cabinets, you can make your kitchen appear grounded in its spot.

The dark cabinets in this kitchen by Hannah Gooch contrast with the white walls around them, helpfully marking out the kitchen from the rest of the room.

Tell us: Have you dared to go dark with your kitchen, or do you prefer a lighter color scheme? 

[Houzz – March 2019]

How to Remodel Your Kitchen

You’ve decided to remodel your kitchen. Now what? Not knowing where to start, many homeowners fall into two camps. Some start by looking at appliances. Others start by collecting inspiring kitchen photos. Some decide they need more room. Others simply want to upgrade their current kitchen. Homeowners may find themselves in this exploration stage for a year or longer before they start interviewing kitchen designers or general contractors. 

Once you’ve pondered long enough and you’re ready to green-light a kitchen remodeling project, then what? We’ll start with the first 9 steps and we’ll get into the nitty-gritty details under specific steps as we move through the complete kitchen remodel workbook.


Kitchen_Remodel_1.JPG

Step 1: Think about what you need in your kitchen remodel

This step is all about how you use your kitchen, and finding the layout and features that fit your household’s lifestyle.

Think about your priorities: how many people will be cooking and gathering here, and how they’ll need to move around in it. Do you need an addition? Or can you work with your existing kitchen footprint?

If you haven’t already, start saving photos of kitchens with features that suit your style. Your collection can be organized and beautiful like a scrapbook or it can be filled with random, unorganized images. I actually prefer the latter, because I like to randomly stuff images into my folders and ideabooks and go back to them later on for edits.


Kitchen_Remodel_2.JPG

Step 2: Research and plan

Ready to green-light that project and take the plunge? The best place to start is by formulating what’s commonly referred to as a scope of work and figuring out your preliminary budget. 

Both of these may be subject to change, so don’t feel like you have only once chance at this. Budget and scope are intertwined and often change many times during the kitchen design process as you become more educated and able to reconcile what you want and what you can afford. As a homeowner, you’re not expected to walk into this knowing what everything should cost. Remember, this is an educational process. 

Step 3: Find the professionals you will need

Even if you’re going the DIY route, unless you’re building your own kitchen cabinets and doing your own electrical and plumbing, you’re going to have to work with a professional at some point. It may be as brief as leaning on your salesperson to help you in selecting and ordering your appliances or cabinets, but it’s something to plan on either way. 

Some people start by visiting big-box stores or cabinet showrooms where they can see everything. Many homeowners get referrals from friends or colleagues and start by hiring an architect or designer. Still others might work on their own with a builder or contractor. Pros are available to help you with everything from contracts and permits to space planning, budgets, choosing finishes and fixtures, shopping, ordering products, helping you set up a temporary kitchen, and managing your project from start to finish.


Kitchen_Remodel_3.JPG

Step 4: Schematic design

This phase includes sketches, space planning, preliminary floor plans and elevations showing the layout and cabinet sizes. I try to keep my clients focused more on layout and space planning, even though the temptation is to talk about what the kitchen will look like. But I find that getting caught up in the look too early can distract from the space planning phase. 

Plus, you need a plan in order to figure out what materials will go where, and how many square feet you will need, and ultimately how much this will cost. I like to begin the contractor interview process early and give them a preliminary drawing packet and scope of work so we can get some ballpark construction numbers. At the same time you can be sending out drawings for estimates on some top choices of kitchen finishes and fixtures.

Step 5: Fixture and finish specification

Throughout this process, and probably long before, you have been saving photos of kitchens you love into your ideabooks and folders. You’ve found your kitchen style, whether it’s modern, classic, traditional, cottage or a personal style in between. You probably know if you want a white kitchen, a natural wood kitchen, or some color. 

Now you need to make your final selection of finishes and fixtures. This usually includes: 

  • Cabinetry construction type, doorstyle, finish and color

  • Countertop material

  • Refrigerators and other appliances

  • Kitchen sink and faucet

  • Light fixtures

  • Flooring 

  • Backsplash

  • Decorative hardware


Kitchen_Remodel_4.JPG

Step 6: Work on design development and construction documents

This is the stage when you finalize the design and prepare final floor plans, elevations, details and, if applicable, mechanical and electrical drawings, lighting switch plans, and exterior elevations.

This is where your final permit set or Construction Drawings (CDs) come into play. It’s important to have finishes and fixtures selected at this time, since this is what will be considered in the final pricing from the contractor. 

You’ll submit drawings for permits. These have a lead time, so check the timing with your local village. You’ll need an architect, designer or licensed contractor signed up to finalize the paperwork and pick up your permits, so get ready to hire someone in the next step. I often find that we’re submitting for permits around the same time or a little bit after we’ve placed the cabinet order, due to similar lead times. 

Step 7: Get contractor estimates

If you don’t already have a licensed contractor on your project, your next step is to find one to carry the project through. I always recommend to my clients to get at least three different contractor estimates. I like to do preliminary walk-throughs with the contractors once the schematic designs are done so we can get some ballpark estimates and find out if we’re on the right track or need to pull back some to fit the budget.

Step 8: Get ready for demo

The big day is upon us, most likely something like 4-8 weeks from when you submitted for permits. Time to get that schedule firmed up and plan on cleaning out the cabinets, putting what you don’t need in storage and — if you’re living in the house during construction — setting up a temporary kitchen so you don’t lose your mind!

You may be moving out of your house temporarily, but most homeowners white-knuckle it and try to live in the house through construction. Preparation and organization can save your sanity. 

Discuss the logistics ahead of time with your contractor. Will you meet once a week for updates? Will you have to be out of the house for certain tasks like demo or flooring? What about debris removal and dust? Are there any family allergy issues? What is a typical work day for the crew? Getting all this on the table beforehand can set expectations and make for a smoother ride. 

Step 9: Surviving the dreaded punch list

Once construction is over, well … almost over … there’s always this annoying little list of items that are missing, wrong, or simply forgotten about. A missing light switch plate, a caulk line that shrank and pulled away from the wall, paint touch ups — small things like this, and sometimes bigger things like the hood doesn’t work, or there’s a big scratch in the newly refinished floor. 

Sometimes the homeowner does the punch list. It can be as informal as an emailed list of items that need to be fixed or finished. I like to use a little form I put together that identifies the item to be fixed or finished, the responsible party and the date of completion. I send it to the client for review, changes and additions, and then off to the contractor. 

It’s inevitable that the contractor may have to make multiple visits back to the house to finish these items; prepare yourself for more than one visit and you’ll be fine. The best way to approach this is with a Zen attitude. Things happen, little things get missed. It’s sort of like making a list for the grocery store and still forgetting some key ingredient. We all do it.

Wood and White Brighten This Kitchen

Article by: Monica Banks

Kitchen at a Glance
Who lives here: A couple with two children
Location: Rosemont neighborhood of Montreal
Size: 210 square feet (19.5 square meters)

After living in their 1945 home for a few years, the owners decided it was time to expand their 155-square-foot kitchen, which lacked sufficient storage and felt cluttered. Originally, the home was designed in the typical Montreal fashion, with one corridor that has separate rooms branching off from the axis. The homeowners wanted not only to have more space, but also to give that space an open-concept feel.


White_Wood_Kitchen_2.JPG

Before. In this snapshot taken before the remodel, the existing kitchen had an eclectic look; the homeowners wanted to give it a cleaner, more minimalist design style.


White_Wood_Kitchen_3.JPG

Before. The kitchen also felt a bit closed in, thanks to the side walls surrounding the entry opening into the space.


White_Wood_Kitchen_4.JPG

Kitchen (After)

Layout. Removing those side walls and opening up the kitchen to the adjacent dining area created more breathing room and brought in more light. The right side of the room is composed of wall cabinetry that gives the family plenty of storage space. The kitchen is now 210 square feet. 

Style. Though the kitchen has a simple palette of primarily wood and white, the space feels dynamic thanks to variation in the textures and shapes — from the subway backsplash and the hexagon floor tiles to the beadwork on the upper cabinets and even the horizontal lines marked by the open shelving.

Floor. The homeowners kept the existing cherry floor but had it sanded and refinished.


White_Wood_Kitchen_5.JPG

This photo shows the left side of the kitchen (when viewed from the dining room). On the floor in front of the sink, the homeowners added a strip of hexagon tile for visual interest. 


White_Wood_Kitchen_6.JPG

Backsplash. Simple white ceramic subway tile gives the room subtle detailing that supports the kitchen’s clean, modern look. 


Island. The island countertop is covered with multiple tile pieces (see first photo in this story) that echo the subway tile pattern. 

Cabinets. A two-tone cabinet scheme contributes to the kitchen’s contemporary feel. The majority of the cabinetry and hardware is from Ikea, but the wood doors were handmade by a local artisan. 


White_Wood_Kitchen_8.JPG

Niche. The cabinetry wall on the right side of the kitchen is broken up by a central nook that the designers finished in herringbone tile. 

Post-KonMari: How to Organize Your Pantry

By: Laura Gaskil

So you’ve tossed the old, unloved and expired food and spices. What’s next? After decluttering the pantry, it’s time to get organized. But with so many organizing products to choose from, it can be hard to know which are worth buying and which will end up gathering dust (or worse: making your pantry even more cluttered). 

To help you bring order to this hardworking part of your kitchen, we’ll divide your things into three categories: stuff you reach for every day, meal building blocks and staples, and occasionally called-for ingredients.


Pantry_Storage1.JPG

Stuff You Reach for Every Day

A tray or platter beside the stove. Your true everyday essentials (think olive oil, salt and pepper) should live within arm’s reach of where you use them. A tray, platter or slab gives these items a defined space to prevent straying, and is easy to move and wipe down. 

Check your own cupboards to see if there’s a platter or tray you can use for this purpose. You may not need to buy anything!


Pantry_Storage2.JPG

A dedicated shelf (or two) for essentials. Beyond salt and pepper, you can probably think of a handful of other ingredients you reach for nearly every day. These items would take up too much room on the counter, so aim for a shelf or cupboard near the stove, or above the counter where you like to chop vegetables. If your pantry is already near the cooking zone, dedicate an eye-level shelf to your essentials. 


Add one or more of these tools to make ingredients easy to spot at a glance:

  • Lazy Susan. A small turntable lets you circulate bottles of oil with ease.
  • Risers for spices. See what’s in the back row without having to rummage.
  • Clear bins. Corral little packets of this and that.


Meal Building Blocks and Staples

Clear, airtight containers for bulk goods. Buying grains, flours and other items from the bulk bins in the grocery store is economical and reduces packaging waste. Once you get home, transferring these items into a good set of canisters will help them stay fresh longer and keep critters out.

Tip: If you like to change up your ingredients frequently, use wipeable chalkboard labels. Then, when you fill the container with something new, you can simply wipe off the old info and write what’s in it now.


Pantry_Storage4.JPG

Risers for cans and jars. Slightly larger than spice risers, these stairstep-like organizers are especially helpful if you have deep pantry shelves and lots of canned goods (or jars filled with homemade goodies). 

DIY: To create your own risers, borrow a few wooden blocks from a child’s set (or get them from the hardware store) and stack in the back of a cupboard to give cans a lift. If the cans are sliding around, top the blocks with a layer of anti-slip tape (available at hardware stores or online).


Pantry_Storage5.JPG

Baskets for potatoes and onions. If you have a walk-in pantry that stays cool and dark, this can be a great place to store potatoes, onions and other produce that doesn’t require refrigeration, such as apples and squash. Pick baskets that will allow air to flow around the produce, and store each type in its own basket. 

Tip: Keep apples in a different section of the pantry since they produce ethylene gas, which can speed spoiling of nearby veggies.


Pantry_Storage6.JPG

Occasionally Called-For Ingredients

“Project cooking” baskets or bins. Project cooking is the kind of cooking you may sometimes love to do, but it’s certainly not part of your everyday get-dinner-on-the-table cooking life. In other words, it’s a project. Think baking birthday cakes, decorating Christmas cookies, making homemade pasta or canning your own jam. 

Instead of mixing the special tools and ingredients required for these projects in with the rest of your pantry items, gather them in a project basket. The size of the basket or bin will depend on how much stuff you need to store, so gather the ingredients together before you go basket shopping!

Tip: Project cooking bins can certainly live on high shelves. Just be sure to label them clearly, and keep a stepladder nearby, if needed, to reach them.


Pantry_Storage7.JPG

Bulk supply bin or crate. If you like to stock up on certain supplies or ingredients, you’ll want to find a convenient yet out-of-the-way spot in which to keep them. The shelves from waist to shoulder height are best reserved for more frequently used items, so use the floor or a high shelf to store your extra goods. 

Bulky but light items (like paper towels) can go on a high shelf, while big and heavy stuff (like bags of dog food) should go on the floor. One or two large bins or crates can keep everything contained.

10 Smashing Black Kitchens

Article by: Becky Harris

White kitchens have reigned for several years now, but black kitchens are gaining ground. They can add a sleek touch, put the focus on a view and contrast materials like nobody’s business. Whether it’s used in an industrial space in Brooklyn, a fashionable apartment in Australia, a villa surrounded by forest in Sweden or a library-turned-home in Oregon, there are good arguments for going dark in the kitchen in all kinds of homes.

1. In this Oregon library-turned-home, the interior designers at Jessica Helgerson Interior Design let the kitchen recede into the background and put the focus on the fantastic windows, which were painstakingly replicated from the originals. Black was used on the trim and built-ins throughout the open plan. Between the open shelves full of cookbooks and the rolling ladder, one can see the library spirit is still alive and well in the home. 

2. In this flawlessly chic Miami, Queensland, Australia, apartment, interior designer James Dawson had the freedom to go graphic. When facing in the opposite direction from the view here, you have a full view of a marina. When facing the kitchen, the eye goes up to an op-art “wallpaper” treatment on the ceiling. (Dawson drew the pattern, then had the wallpaper crew cut and apply the shapes.) 

Sleek black wood-veneer cabinets and black marble countertops keep a streamlined look, while mirrored backsplashes on either side bounce the light around. Using the black created a strong contrast that doesn’t compete with the view. 

3. This black kitchen also opens to much lighter rooms with coastal views, so it recedes into the background in a sleek, sophisticated way. The designers at LDa Architecture & Interiors were inspired by the rocky Massachusetts coastline right outside the home when choosing the countertop. This large slab creates a stunning middle ground between the black and white. 

4. This villa perched in the forest outside of Stockholm, Sweden, emphasizes different views, that of trees and moss. (In fact, it is named Villa Vy, and vy is Swedish for view.) Suitably, the designers at Kjellander + Sjöberg Architects put the focus beyond the glass on the trees and the moss by creating a black kitchen. The color also helps the space look less like a kitchen within the open plan.

5. The Aussies certainly have the black kitchen thing down. Auhaus Architecture chose a matte black finish for the laminate cabinets here. The finish is just the right complement for all of the natural wood, which includes spotted gum flooring in a Bona Natural finish and an island top of grey box (a highly durable hardwood). Both the woods and the black laminate take a backseat to the stunning graphic Moroccan tile cement tile backsplash.

6. Jeffrey Douglas of Douglas Design Studio recommends making sure that a kitchen has good light showing through from different angles before going black. This kitchen gets plenty from the large windows and doors and another window in the backsplash (not shown). This is also a story of wood — the cabinets are Canadian red oak with a charcoal stain. Engineered white oak flooring, a light ceiling and a rich wood island add warmth. 

7. Interior designer Candace Cavanaugh specified black-brown when coming up with a custom color for these cabinets. The hue adds an unexpected warmth to the dark room. She then custom designed taxicab-yellow counter stools to add a playful dash of color. The overall look is glamorous and unexpected.

8. Renovation Design Group gave this bungalow the contemporary loft-like feel that the owner preferred. The black cabinets fit right in with the industrial-style corrugated ceiling, glass garage door, concrete countertops and stainless steel accents.

9. This industrial kitchen in Brooklyn, New York, used to be an industrial woodshop. Appropriately, the island is a well-worn vintage workbench. Dark cabinetry and appliances put the focus on items that homeowner Alina Preciado has collected on her worldwide travels, including spices and unique teapots. 

10. In this creative Toronto loft, the galley kitchen’s appliances and cabinets have a sleek, streamlined look, putting the focus on the exposed brick and unusual light fixtures. And, of course, on the chalkboard wall, which invites clever artwork (in fact, this made our chalkboard art hall of fame). Note the way the lighting helps highlight the objects along the top shelf. 

9 Ways to Spice Up Your Kitchen Cabinetry

Article by: Jo Leevers

Freestanding cupboards, mix-and-match colors, contrasting textures, individual drawer pulls — kitchens can be as creative as their owners. If sleek, clean-cut units don’t get you excited, take inspiration from these nine ways to get a more varied look in the kitchen.


SpiceUpCabinetry1.JPG

1. Mix cabinet styles. This kitchen’s cabinets are all the same trendy gray, but they sidestep predictable symmetry because two pieces are different styles. They work together, but their drawers have different depths and storage options. A rail for pots and pans creates more variety.


SpiceUpCabinetry2.JPG

2. Feature a key piece. To keep things interesting in a kitchen with matching cabinets, add a standout storage unit. It could be a plate rack or a bright or weathered dresser. It will break up the rigidity of a single-finish kitchen and let your personality shine through.


SpiceUpCabinetry3.JPG

3. Work in an island. For impact in a large kitchen, an island needs to be a “hero” piece that can carry the space. This weathered central island doesn’t conform to any norms. Along with the industrial storage on wheels, it adds just the right amount of character.


SpiceUpCabinetry4.JPG

4. Try an urban loft style. A strong dose of industrial style livens up this slim kitchen. Wood, metal, gray paint and ceramic surfaces mix easily, thanks to similar tones. Then there are the contrasts: Bare bricks are mirrored by glossy metro tiles, waist-level units by a taller cabinet. Matching kitchen pieces in this space could have looked too uniform; these look freed up and innovative.


SpiceUpCabinetry5.JPG

5. Go two-tone. A blend of two shades — palest green and natural bare timber — brings a breath of fresh air to this kitchen. Tongue and groove cabinets and two types of handles are extra custom twists.


SpiceUpCabinetry6.JPG

6. Compare and contrast. A creative kitchen doesn’t have to be off-the-charts unusual. Simply combining two tones, two surfaces and two heights does the job. Carefully crafted finishes give the space a quality feel.


SpiceUpCabinetry7.JPG

7. Cast it in monochromes. The dark-on-light color scheme here adds visual interest, and the contrast of raw, waxy timber and smooth marble creates a look that’s unique.


SpiceUpCabinetry8.JPG

8. Add your own handles. This kitchen works its magic with off-the-shelf Ikea units with tactile leather handles. They handles are eye catching and pleasant to hold — significant, when you consider how often they’ll be used. Open shelving on top combines with a stainless steel countertop that wouldn’t be out of place in a chef’s kitchen.


SpiceUpCabinetry9.JPG

9. Pare it back. This converted industrial warehouse is a dramatic space, so the designer wisely didn’t try to make the kitchen steal the show. Zinc-colored doors inside pale frames, metallic tones and a pared-back 1960s vibe for the furnishings help this kitchen work in its setting — proof that statements don’t always have to be shouts.

Woodipedia: Is It Cherry or Is It Alder?

Article By:

Stains have made it very easy to color one type of wood to make it look like another kind. But there are two species of wood that really do look alike in their raw state: cherry and alder. Here’s how to tell the difference. 

When you think of a cozy country kitchen, most likely you are envisioning warm-colored cherry cabinets. “Cherry was one of the most popular cabinet woods in rural areas throughout the country, because it was so widely distributed across the United States,” notes Andy Richmond, vice president and certified appraiser at Garth’s Antiques in Delaware, Ohio.

Yet there is another wood species that features a milder version of cherry’s reddish tones and grain patterns. Alder is affectionately referred to by woodworkers as “poor man’s cherry.” With a coat of finish, it can easily pass for cherry to less-discerning eyes. 

Cherry basics. When we speak of cherry, we are really referring to black cherry — Prunus serotina. A distinctive element of most cherry wood is gum spots, or pitch pockets. They’re short, black streaks that look like hardened resin deposits.

Sometimes cherry has pin knots — tiny brown circles that again add visual interest. High-end cherry is figured, meaning undulating rays of light seem to shoot across the grain, lending the board a shimmering depth. This radiant effect is called chatoyance.


Alder basics. Commonly known as red alder, Alnus rubra grows principally in the Pacific Northwest, where it is the most commercially abundant hardwood. The consistent grain pattern and quiet coloration of alder is polarizing. Some people like it for exactly that reason, while other people find it boring. Alder can have pin knots, but it doesn’t have gum spots.

You’ll sometimes hear references to clear or knotty alder, but those are just general descriptions. “That’s not a grade,” says Walt Maas, manager of Bohnhoff Lumber in Vernon, California. “There are industry standards for grading lumber — like there are for grading meat. Each type of wood has its own specifications that professional hardwood lumber graders follow.” 

This makes it easier to compare prices when shopping. However, Maas notes that some companies put their own proprietary grades on lumber, which makes comparison shopping more difficult. 

Other by Vernon Furniture & Accessories VERMONT WOODS STUDIOS 

Differences between cherry and alder. There are three main differences. First, alder is significantly softer, so it weighs less. Second, alder is cheaper. And finally, alder has no sapwood, which is the creamy colored wood on the edge of a board. Like walnut, cherry is known for having a lot of sapwood. 

Cost. Cherry’s price is somewhat dependent upon the amount of sapwood. Most boards have more heartwood (the pinkish-red color) on one side and noticeably more sapwood on the opposite side. The percentage of each on a single board influences pricing. Another factor is board width. Wider boards of all species are more expensive.

Maas reports that the current wholesale price of cherry at his yard is $3.20 per board foot. Alder is priced substantially lower, at $2.70 per board foot. 

Color. While alder is fairly even in color, cherry’s basic red cast can have a whole spectrum of variations. This makes it difficult for woodworkers to color match the boards on large projects. Gene Leslie of Rancho Cucamonga, California (who made the cherry cabinets shown here) evened out the disparate tones by treating all the wood with lye to artificially age it while maintaining the clarity of the grain. Amateurs need to be thoroughly educated on this process before attempting it, however, since lye is highly caustic. 

When making tabletops and cabinet door panels, woodworkers frequently cut off the sapwood to feature the prized heartwood. The sapwood is then used for the interior structures, especially in drawer construction. 

Durability. Black cherry rates 950 on the Janka scale for hardness, which puts it on equal footing with soft maple but far below tougher hard maple (1,450) and black walnut (1,010). 

Alder is rated 590, ranking it as a very soft hardwood, slightly above poplar (540).


Not cherry. While there are no wood types erroneously identified as alder, there are several misnamed cherries. Chief among them is Brazilian cherry, also known as Jatoba. It’s an extremely popular flooring choice these days, not only because of its cherry-like color, but also because of its durability. Brazilian cherry rates 2,350 on the Janka scale. (Remember, hard maple is 1,450.)


Other woods masquerading as cherry are Patagonian cherry, Bolivian cherry and African cherry, which is also known as Makore.
 

Finishing. Cherry and alder are both prone to blotching when finishing coats are applied. Again, some people accept this as a beautiful trait of real wood, while other woodworkers try every finishing trick in the business to minimize it. It’s a good idea to ask for a finished sample. 

UV stability. Cherry naturally patinates to a darker, richer color over time. American antiques specialist Andy Richmond notes that antique cherry furniture can resemble mahogany.

It’s also a notoriously UV-unstable wood, which some woodworkers use to their advantage. To quickly and painlessly deepen the color of some cherry boards, woodworker Gene Leslie intentionally leaves them out in the sun after milling them. 

Sustainability. Domestic hardwoods have been endorsed by the U.S. Deptartment of Agriculture as a preferred green building material — in large part due to the responsible harvesting methods practiced by the American hardwood industry. The other important factor in the sustainability of American hardwoods is the minimal transportation requirements, compared to those of imported exotics.


Smart Investments in Kitchen Cabinetry — a Realtor’s Advice

Article By: Tiffany Carboni

The kitchen is the most expensive room in the house to build. The national average cost of a kitchen remodel is $50,000, though the real cost can vary widely, depending on where you live, the scope of the project and the materials you choose. New cabinetry can take up much of that expense. Make the most of this big purchase by treating your new cabinets as an investment. 

Realtor Victoria Gangi offers insider tips on how to get the best return on your cabinet investment, even if you’re not moving in the foreseeable future. 

Create an optimal layout. Long before a kitchen starts to take actual shape, there needs to be a well-crafted plan for how the kitchen will be laid out to offer maximum benefits to the homeowners and their guests. 

“Layout is the number-one feature home buyers are looking at in a kitchen,” says Gangi. “You will lose your audience if cabinets aren’t designed in a functional way with good flow.” 

A kitchen or cabinet designer can help you get started. Don’t make any rushed decisions in the planning process. 

One way to help visualize a designer’s plan is to tape out the dimensions of the new cabinet configurations on the floor and walls. Granted, you’re going to need a really good imagination for this to work, but it will give you an opportunity to literally walk through the measurements to see if things feel well spaced. 

Invest in quality cabinetry. Once you’ve got a plan for where everything’s going to go, decide on a style and quality that will age well and withstand trends and changing tastes.

Quality cabinets are one of the smartest investments in a kitchen remodel, saysKarl Keul, owner of Cameo Kitchens. “The lesser grades of cabinets tend not to age gracefully and often need more upkeep,” he notes.


The quality to choose will depend on your long-term plans. “Midrange cabinets are generally a good bet,” Gangi says. “If you intend to sell your home, these cabinets will look attractive to buyers, and you’ll likely see a return on your investment.”

She adds, “Even if you plan on staying in your home for the foreseeable future, this is still a safe option, because they’ll last. Choose top-of-the-line cabinets only if you have the money to create the kitchen of your dreams without any worries of recouping the money.” 

Integrate the door style. Choose a door style and color that integrate well with the rest of your home, especially rooms that look directly into the kitchen. If the rest of your house is traditional, you’d be better off steering toward a more traditional or transitional door style than going completely modern, and vice versa.  

“Don’t choose a style that’s too ornate or too modern,” Gangi advises. “Modern is good; people like clean lines and clean finishes. But ultramodern or any style that’s too out of the norm isn’t what buyers tend to want.” 

In general the best kitchen designs are those that work in harmony with the rest of the home’s architecture rather than try to fight it. A harmonious house is easier for potential buyers to understand and, in turn, to want to outbid each other for. 

A savvy designer can help navigate you toward the best cabinet options that will work for your home and budget.


Choose light colors. Lighter-colored cabinetry will appeal to more buyers. “Dark kitchens are out,” notes Gangi. “People prefer light and bright.” 

To integrate the appliances or not? Integrated appliances significantly increase the cost of a kitchen, not only because of the added cabinetry door fronts, but also because the appliances needed to facilitate this option are more expensive.

While this feature may look attractive to some home buyers, especially in a price range where integrated appliances are an expectation rather than an exception, your may not see the return on this high-priced detail in a midrange-price house. 

According to Gangi, your cabinet investment can be safe even if you don’t integrate the appliances. “Stainless steel appliances are still very popular and well accepted by buyers,” she says. 

Choose cabinet details that matter. What’s inside the cabinet is just as important as what’s on its outside. “Buyers are on the lookout for rollout and quiet-close drawers,” notes Gangi. “This is where that choice of midrange versus low-range cabinet quality becomes important. Spending the extra money it takes to get good-quality slide rails and quiet-close features will come back to you.”


Opt for clean-lined hardware. “Buyers prefer drawer pulls and handles to be just as clean lined as the cabinetry,” says Gangi. 

If you like ornate hardware, go for it. However, should you sell your home, expect to replace those fancy pulls with a more streamlined set that will appeal to a broad range of buyers. The good news is that your fancy hardware can move with you.